

As you may have read in some of my earlier posts I am participating in the Valentine Craft Swap being put on by Becky over at Strumpet's Crumpets. As soon as I was assigned my swap partner (hi Ruth!) I knew straight away what I wanted to make - a plush cupcake! It is something that I have been wanting to make for a while now and now I had the perfect reason to make one. So I sat down, drew up a pattern, bought my material and got sewing! I have to say it was a lot of fun and it has definitely made me want to do a bit more sewing. I thought since I am relatively new to it all that it would be a bit weird for me to post up a tutorial, but then I thought 'what the hell?'. So here we are the first ever Red Deer tutorial!
How to make a plush cupcake
Pattern
Cupcake top (pdf) and Cupcake bottom (pdf)
Tools
Tracing paper
Pencil
Scissors
Pins
Sewing needle
Sewing machine
Stuffing stick (or chopstick)
Materials
Felt for the cupcake top (I used bright yellow)
Felt for the hearts (I used light and dark pink)
Felt for the eyes (I used black)
Felt for the cheeks (I used light pink)
Felt for the mouth (I used red)
Fabric for the cupcake bottom (I used a cream cotton fabric)
Matching embroidery thread for the hearts, eyes, cheeks, mouth and cupcake bottom
Sewing thread to match cupcake top and bottom
Stuffing (polyfill)
Instructions
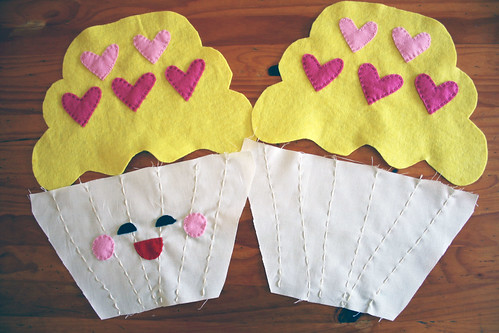
Download and print the patterns for the cupcake top and bottom. Using your tracing paper and pencil trace out the cupcake top, a heart, an eye, a cheek, the mouth and the cupcake bottom.
Cut out all of the shapes from the tracing paper, pin to the appropriate fabric and cut out the pieces. (Obviously you will need 2 cupcake tops, 2 cupcake bottoms, 10 hearts, 2 eyes, 2 cheeks and 1 mouth).
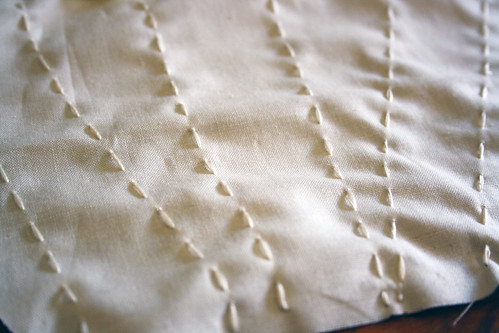
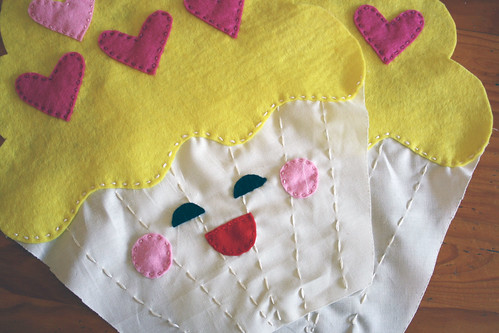
Next using the lines on the cupcake bottom pattern as a guide embroider some running stitches on both cupcake bottom pieces using an embroidery thread that matches the fabric.
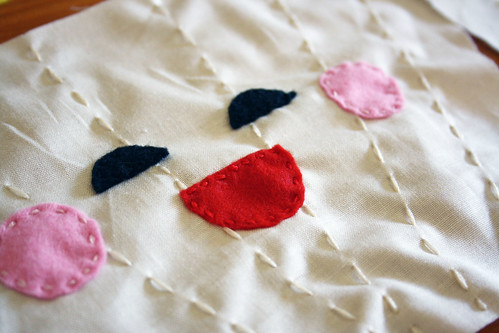
Using matching embroidery thread sew the eyes, cheeks and mouth on to the front of one of the cupcake bottom pieces.
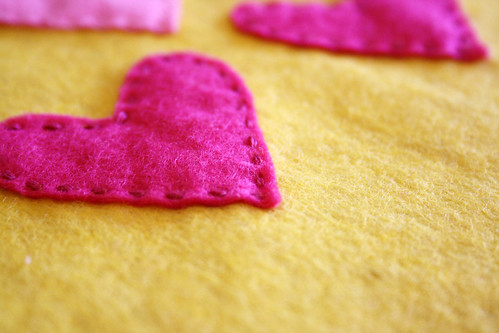
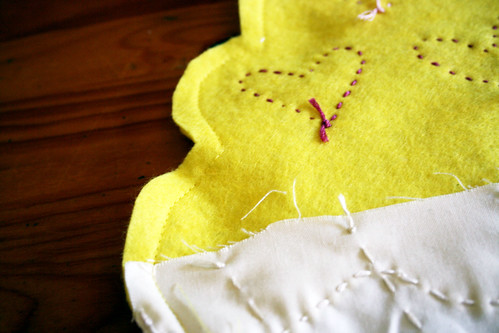
Using matching embroidery thread sew the hearts onto the two cupcake top pieces - using the cupcake top pattern as a guide for placement.
Now you are ready to piece together your plush cupcake.
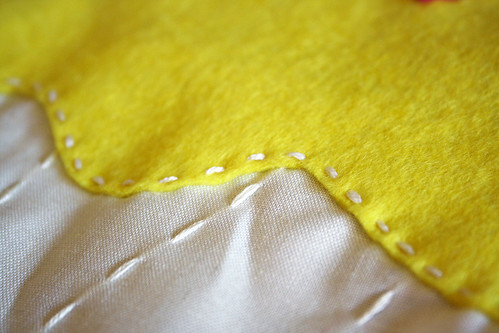
Sew the cupcake tops onto the cupcake bottoms using the same embroidery thread that were used to embroider the cupcake bottoms.
Now you are ready to finish this baby!
Pin the two cupcake pieces together (right sides facing) and using your sewing machine sew around the edge leaving at least a 1cm border, and leaving a small gap (4cm or so) on the cupcake bottom for stuffing. Now take your scissors and clip the fabric around the curved edges.

Turn the cupcake the right side out through the gap that you left - be gentle!
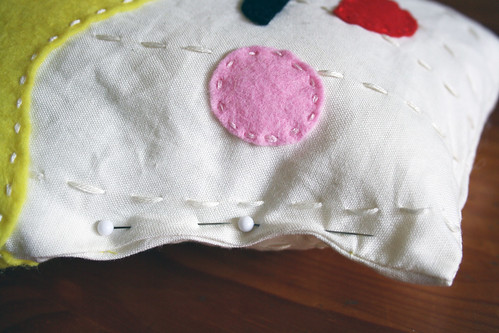
Stuff the cupcake using the stuffer/chopstick to push the filling into all of the corners of the cupcake. Then pin the stuffing opening and use a blind stitch to close it.
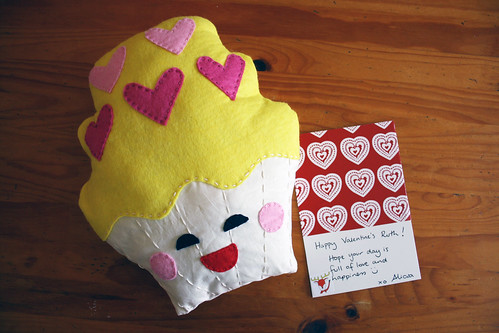
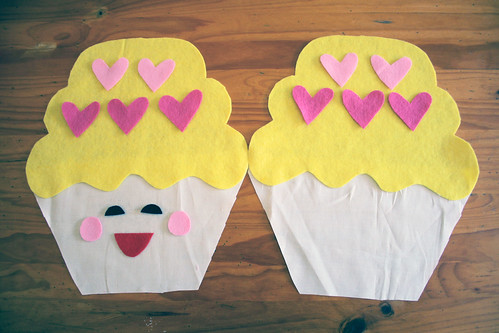
Voila! You now have a plush cupcake!!

Hope you like your present Ruth - and I hope you have a wonderful Valentine's day!
22 comments:
oh my goodness!! that is soooo cute! i love it :)
Alicia you are so freaking cool and clever...and talented. Jealous! This looks so gorgeous...I can't believe it was your first crack!
oh wow! That is adorable. You are too clever!
Your cupcake is adorable! I love the little hearts on top. I bet your swap partner was a happy girl receving this.
Rose
I am just in awe of anyone who can make cute things like this...I am completely sewing impaired unfortunately.
Sigh this just increases my desire for a sewing machine. Soooo cute!
Alicia! Not only do you make yummy real life cupcakes, but you also make adorable plush ones! I'm sure your swap partner will love it... ♥
This is awesome! I love your tutorial and your huge cupcake, I'm sure Ruth will love it!
I came by from the Indie Business 3.0 website to say hi! Nice to meet you, classmate!
Love it! Well done with the tutorial!
I love your tutorial. Thank you for sharing.
SO cute! Already thinking it may be a good birthday present for a friend :) Thanks for the tutorial!
adorable!!!!
This is PERFECT! I love the colors that you've used! I'd love to receive one of those!
Thanks so much for the tutorial!
Well that is just the cutest thing ever!! love it!
wow, alicia this is delightful!
How adorable! I bet your partner squeals with delight when she sees it! I'd love to feature this post with your link on my blog sometime...if that's okay!?
xo,
Sena
Love it! Just the cutest cupcake softie I've seen. And thanks so much for sharing on Craft Schooling Sunday, I hope you'll be back again with more great crafts, all the best!
Now these are some fabulous cupcakes, I wouldn't have to feel guilty about! Very cute!
This is so cute! It makes me happy haha x
Wow this is really super cute! My 5 year old would love it. I found you looking for projects I want to do with her. Thanks!
How cute, my 3 year old wants her room done in cupcakes, this will make a really cute throw pillow for her bed. And can do some little ones to maybe hang, great idea, thanks.
"Interesting read! Although the topic is different, it somehow reminded me of how much detail and creativity go into textile arts like chenille embroidery. It’s amazing how various forms of art can inspire each other!"
Post a Comment