Friday, December 31, 2010

Happy New Year!

NYE 2011

So much has happened this year - I started studying my Bachelor of Business (Accounting), I discovered I was pregnant, my husband and I separated, I moved in next door to my mum, my gorgeous Zoe turned 2 and I welcomed little Grace into my family. There have definitely been lots of ups and downs - but I have to say that at the end of it I am happy and I am excited to see what 2011 will bring.

Sparkler Heart

I hope you all had a great year in 2010 and I wish you all the best for 2011. 

Thursday, December 30, 2010

Cherry Pavlova

Cherry Pavlova

To me pavlova would have to be one of my all-time favourite desserts - so light and fluffy, so sweet and in general - so easy to make! Now I say 'in general' because there are a few areas where people go wrong. Firstly you need to be sure that when you are beating your egg whites that the bowl and whisk attachment are perfectly clean and dry - otherwise you won't be able to get those lovely stiff white peaks. Secondly you need to make sure that the oven is turned down nice and low so that you don't burn your meringue. And thirdly - don't open the oven door! The heat that escapes from the oven each time you open that door will mean that the element turns on, therefore you risk browning the pavlova. So if you avoid all of the usual traps you shouldn't have a problem baking your pavlova and you should have a very tasty dessert for very little effort.

Pavlova
Serves 6-8

4 egg whites, at room temperature
1 cup caster sugar plus 2 tbsps
1 tbsp cornflour
1 tsp vanilla extract
1 tsp white vinegar
  1. Beat egg whites until stiff but not too dry.
  2. Add sugar 2 tbsp at a time.
  3. Add cornflour, vinegar and vanilla and beat for 1 minute.
  4. Put onto a lined tray and smooth into a circle.
  5. Cook at 110C fan forced for 1.5 hours.
Cherry Syrup (from Margaret Fulton)

250g fresh cherries, stones removed
1/3 cup sugar
1/4 cup cold water
  1. Cook cherries, sugar and water on a medium heat for 5 minutes or until cherries are soft.
  2. Puree in a blender, rub through a sieve.
  3. Return to a saucepan and cook on a high heat for another 5 minutes, until thick and syrupy.
Assembling

450ml thickened cream, whipped
1kg fresh cherries, stones removed
  1. Place pavlova on a serving plate and cover with whipped cream.
  2. Decorate with whole cherries and cherry syrup.

Wednesday, December 29, 2010

Grace - 2 months old

Grace my darling baby girl you are now 2 months old and so much has happened this last month...

Grace - 2 months old

You gave us your first smile.

Grace - 2 months old

You discovered the bouncinet.

Grace - 2 months old

You fed a lot and grew a lot.

Grace - 2 months old

You found your favourite place to sleep.

Grace - 2 months old

You experienced your first Christmas.


Happy 2 month birthday baby girl! I can't wait to see what the next month brings.

Tuesday, December 28, 2010

20 Sweets in 20 Weeks - Voting time!

Folks I am restarting the 20 Sweets in 20 Weeks project. In case you can't remember way back in February I started this project where I would pick a different type of sweet food each week and I would give you, the readers, 3 different recipes to vote on. I would then post that recipe the following week, along with my rating. So far I have done cheesecakes (New York Cheesecake), cut-out cookies (chocolate cookies) and layer cakes (caramel layer cake). I posted a poll a while ago to let you choose which hot pie I should bake - and this week I am going to bake an apple pie. In the meantime however I want you to vote on what kind of brownie I should make...

Indulgent Brownie Torte


Brownies!

Lemon & Coconut

Chocolate

Double-Chocolate Marble Swirl

Monday, December 27, 2010

Move it to lose it - Week 1

Move it to lose it - 12 Week Challenge

Starting weight: 75.2kg 
Previous weight: 75.2kg 
Current weight: 75kg

Week one of the challenge is done and I am extremely glad to have lost 200g. I know that it isn't much, but frankly the fact that I lost any weight over Christmas is a win in my opinion. I am actually quite surprised that I lost any weight at all because I ate a lot of naughty food - rum balls, cointreau balls, panforte, dips, cheeses, pate.... everything you can think of really. And not only did I eat badly but I only managed a few walks with the kids for exercise - so that wasn't too flash hot either. So I think that I can probably attribute my loss this week to breastfeeding and not much more. 

This week is going to be a different story though! Christmas is done and dusted and now it is time to get serious. So here are my goals for this week...
  • Eat reasonable portion sizes at every meal
  • Eat healthy foods - except for dessert twice in the week 
  • Drink at least 2L of water every day
  • Exercise four times
And hopefully if I can achieve these goals I will see a better loss at next week's weigh-in.

Sunday, December 26, 2010

Christmas Day

Christmas

Well Christmas has come and gone, and I have to say it was one of the best ones I have had for a while. We started the day with the usual present opening, but this was the first Christmas where Zoe was able to open up her own presents - and she had a ball discovering all of her new toys. This year she was given a whole heap of play food, a tea set, the Fisher Price Little People backyard set, wooden blocks, a play toaster, a Dora the Explorer puzzle, some In The Night Garden books, a cute green pot and the big present from me...

Christmas

A play kitchen! A very fitting present I think from a mum who loves to bake - and so far Zoe seems to think that it is pretty cool (but not as cool as her new tea set).

I gave a Grace a few rattles and some toys for the pram, not much - but she seemed pretty happy with it...

Christmas

I was given a lovely towel set and some gorgeous new coffee mugs from my mother, a beautiful sarong from my sister, a sheet set from one of my best friends and a gorgeous little guardian angel and 'Dream' sign from my other best friend. The little guardian angel already seems to be doing its job in helping little miss Grace get to sleep. Thank you Auntie Leah!

Christmas

After all of the present opening we let Zoe play while we had our Christmas brunch - ham and cheese croissants. The rest of the day was pretty relaxed with a nibbles dinner (cheeses, dips, turkish bread and oysters) outside in the glorious summer weather, and then later lots of chatting, laughter and pavlova (I'll post the recipe for that later this week).

I hope you all had a wonderful Christmas too.  What did Santa bring you?

Friday, December 24, 2010

Merry Christmas

Christmas

Tomorrow my little family will be having a quiet brunch after opening lots of presents (Zoe is going to love it) and then we will be having a relaxed dinner to finish off the day. What have you all got planned for the big day? I hope it is filled with lots of good food, love and great company.

I'll be back on Sunday to recap our Christmas day fun - in the mean time have a very merry Christmas!

Thursday, December 23, 2010

Christmas Baking - Panforte

Panforte

I have seen a lot of recipes for panforte over the years and I was always interested in giving it a go, but for some reason I never did. This year I decided it was time to finally take on the panforte challenge. I have to say that it is quite easy to make except when it comes to stirring in the hot syrup. They are not joking when they tell you to quickly mix it all together - it turns as hard as rock really, really quickly! I found it incredibly hard to stir - it definitely gave my arm a good workout. The other trouble I had was with baking it - after the allotted 45 minutes mine was no where near baked through but the top and edges were starting to brown. So I ended up having to remove it from the oven, wrap it in a few layers of aluminum foil and then bake again for around 20 minutes at around 275 F. That seemed to do the trick.

The end result is a tasty Christmas treat with lots of dried fruit and nuts, that sends a lovely honey-cinnamon aroma through the house. So what are you waiting for? Give it a try.

Panforte

Panforte
Makes 60 pieces

330g caster sugar
1 cup honey
300g plain flour
1 tsp mixed spice
1 tbsp ground cinnamon
750g mixed dried fruit
250g blanched almonds, roasted
250g hazelnuts, roasted
pure icing sugar, to dust (I didn't bother with the icing sugar)
  1. Preheat oven to 180 C. Grease and line a 30cm x 20cm cake pan.
  2. Heat sugar and honey in a heavy-based saucepan on low, stirring, until sugar dissolves. Increase heat to medium and boil until mixture reaches 115 C on a sugar thermometer. (If you don't have a sugar thermometer, drop a little of mixture into cold water - it should form a soft ball.)
  3. Meanwhile, combine flour, spices, dried fruit and nuts in a bowl. Add hot syrup and quickly mix together (really quickly!). Scrape mixture into prepared pan. Use wet hands to pat down flat. Bake for 45 minutes (see above for what I had to do to get it to bake). Cool in pan.
  4. Turn out and dust liberally with icing sugar. Cut into thin slices (warning: you need serious arm muscles to slice it).
Rating?
Me - 4/5 - I love the rich honey flavour together with the fruit and nuts.

Wednesday, December 22, 2010

Christmas Baking - Cointreau and Sponge Finger Balls

Cointreau and Sponge Finger Balls

So in my last baking post I mentioned that I would be making four Christmas treats - well scrap that. I attempted a new recipe for almond brittle rocky road and it was a complete disaster. And I mean complete. The brittle melted all of my rocky road and then it didn't set! So I was left with one soggy melted chunk of supposed rocky road, a huge mess and a grumpy attitude. Funnily enough it was a recipe from Better Homes and Gardens, which you may remember gave me a whole heap of trouble last Christmas time (see here, here, here and here). So that is it - definitely no more recipes from Better Homes and Gardens for me.

Now back to the real baking - these little balls of Cointreau and chocolately goodness are just delicious, and so easy to make! If you are short on time this Christmas but want a tasty treat to give away then this is the recipe for you.

Cointreau and Sponge Finger Balls

Cointreau and Orange Sponge Finger Balls
Makes 35

1 tbsp Cointreau
1 cup dried apricots, finely chopped
250g sponge fingers, processed until fine
1/2 cup desiccated coconut, plus extra to sprinkle
grated rind of 1/2 orange
395ml sweetened condensed milk
50g butter, melted
500g white, milk or dark chocolate, melted
  1. In a bowl, pour Cointreau over dried apricots and set aside to soak for 15 minutes.
  2. Combine apricots, sponge fingers, coconut, orange rind, condensed milk and butter in a bowl to form a soft mixture. Form small balls, and allow to set in the fridge.
  3. Once firm, dip balls into melted chocolate and sprinkle with extra coconut. Chill until set.

Rating?
Me - 4/5 - yummy, I love the little chunks of dried apricot through them.
Mum - 4/5 - tastes just like a jaffa.

Monday, December 20, 2010

Move it to lose it - 12 Week Challenge

Move it to lose it - 12 Week Challenge

I have a confession to make - I am overweight. Yes I know I just had a baby a little over 7 weeks ago, but that doesn't change the fact that I need to lose some weight. I managed to put on 19 kilograms while pregnant with Grace and so far I have lost just over 14 over those kilograms. That means that I am just 5 kilograms off of my pre-pregnancy weight. The only problem is that I was also overweight before I got pregnant, so I have even more to lose.

Now you might be thinking that the week of Christmas might be a strange time to start a new health regime, but I am sick and tired of making excuses for myself. Christmas is only one day and sure I will enjoy myself that day - but the rest of the week I can start to get my body back into shape! So today I start my "Move it to lose it" 12 week challenge where I aim to make over my lifestyle by eating well, having good portion control and getting a healthy dosage of exercise each week. Hopefully by the end of it I will have lost some weight, but even more importantly I want to look and feel great.

So here are my beginning statistics:

Weight: 75.2 kgs
Bust: 102 cm
Chest: 87 cm
Waist: 89 cm
Hips: 106 cm
Thighs: 58.5 cm
Calves: 38 cm
Upper arm: 28.5 cm
Forearm: 26 cm

Join me if you want - otherwise you can read about my 12 week challenge here on my blog. I'll provide an update every Monday that will detail my new statistics and how the week went (all the gory details of the blood, sweat and tears).

Maybe at the end of it I will even provide a before and after shot - if you are lucky ;)

Sunday, December 19, 2010

Christmas Baking - Rum Balls

Hello again! Look at this I am actually staying true to my word and blogging again - and so soon!

Well as we all know it is that time of the year for Christmas baking and while I am not going as crazy as I did last year (see the 
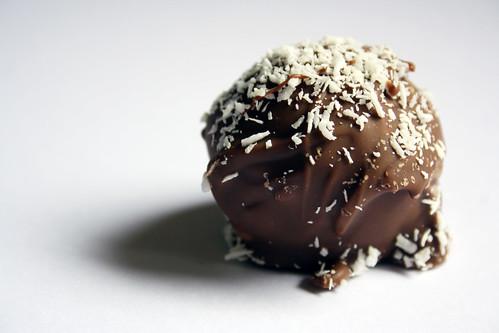
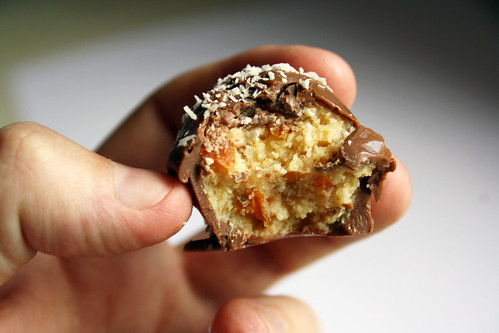
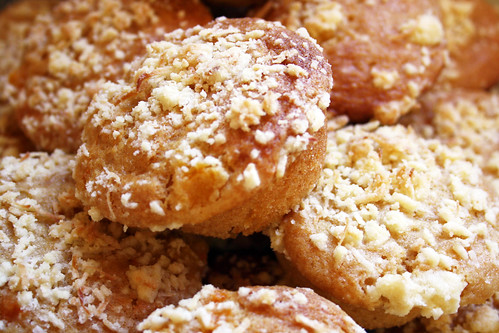
12 Days of Baking Days of Christmas) I am going to bake up a few goodies (four to be exact) to give to people as gifts. First on the agenda is rum balls - a classic Christmas treat that is super easy to make, great for gifting and of course tasty.

I thought I would try a new recipe this year and I while it is good, I think the recipe I used last year was better - but nonetheless I shall post the recipe up for you to peruse and I'll let you decide which you would like to make (if any).

So without further ado...

Rum Ball


Rum Balls (from some magazine - I tore out the page so now i'm not sure which)
Makes 45

400g packet digestive biscuits, broken
120g shredded coconut
125g good quality drinking chocolate
120g butter, melted
395g can sweetened condensed milk
60ml rum, or more to taste
25g good quality cocoa, to dust
1/2 cup sultanas (an extra that I decided to add)
  1. Place biscuits in a food processor and pulse until fine crumbs form. Transfer to a large bowl.
  2. Add coconut and drinking chocolate (and sultanas if you want).
  3. Stir in butter, then condensed milk. Mix well.
  4. Stir in rum.
  5. Chill for at least 30 minutes, or up to 24 hours.
  6. Roll teaspoons of mixture into small balls.
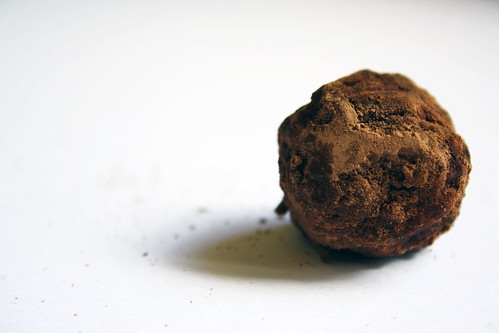
  7. Roll balls in cocoa to coat.
  8. Store in an airtight container in the fridge until ready to serve.
Rum Ball

Rating?
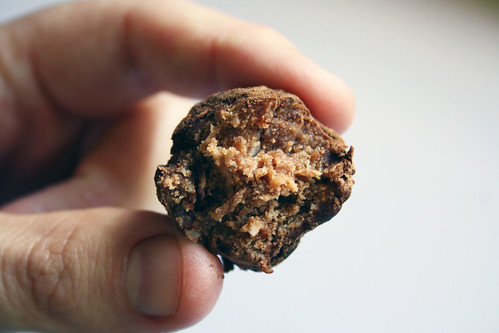
Me - 3/5 - I thought it was a tad dry, but otherwise yummy.
Big sis - 4.5/5 - "I like it a lot. I could eat more."

Friday, December 17, 2010

I'm back....

And hopefully this time for good.

So let me give you a short update on what I have been up to.
  • Very, very little baking has been going on in this household - I just haven't had the time or energy for it for quite some time now.
  • I finished my second subject in my Bachelor of Business (Accounting) degree - and I got a high distinction
  • And oh yeah - I had a baby!


Grace Ellen Zakarevicius
Born 29th October 2010 at 6:28pm
Weighing 4.1 kilograms (9 pounds 1 ounce)
Measuring 50cm

After a very quick (and painful) two hour labour my darling daughter arrived in this world. I won't bore you with the birth story, but it is suffice to say that I won't be doing that again in a rush! Ouch! Focusing on the positives though, there were no complications - Grace was perfect and I was up and about within minutes. Here we are just minutes after she was born...


And then after a lovely warm shower, with Grace dressed in her first ever wondersuit...


And in case you are wondering this was my last pregnancy photo that I got to take - it was taken the day before Grace was born, when I was exactly 39 weeks.


So that is my rather large news - only took me 7 weeks to tell the blogosphere, because now little Miss Grace is 7 weeks old and going strong.

I hope to keep this blog alive, but at this point in time I'm not sure what I will be blogging about because I am trying to lose a little bit of weight and baking does not fit into the weight loss equation very well. I'm sure I will think of something though.

Stay tuned!

Friday, July 9, 2010

Voting time...

Image by Pillsbury.com


And this week you are voting for....

Hot Pies!

Apple

Blueberry

Apricot


I'm going away for the weekend, but I'll make those chewy chocolate cookies when I get back - Tuesday hopefully. Have a great weekend everyone!

Rock Cakes


Zoe and I decided to do some baking again this morning, what a great way to spend a frosty winter morning. So I had to go by what I had available in the pantry today as my groceries don't arrive until Monday (that means those chewy chocolate cookies won't be baked until next Tuesday - stay tuned). Luckily we had all the ingredients that you need to bake some rock cakes - a classic baked good that is easy to make, good for the kiddies as they aren't too sweet and good for the parents with a nice cup of tea. So without further ado...


Rock Cakes (from The Australian Women's Weekly Basic Cookbook)
Makes about 15

2 cups self-raising flour
1/4 tsp cinnamon
1/3 cup caster sugar
90g butter, chopped
1 cup sultanas
2 tbsp mixed peel
1 egg, lightly beaten
1/3 cup milk
  1. Sift flour, cinnamon and sugar into a medium bowl, add butter, rub in with finger tips. Stir in fruit and peel with a wooden spoon.
  2. Make well in centre of dry ingredients, add egg, then enough milk to give a moist but still firm consistency. If mixture is too soft, cakes will spread too much during the cooking time.
  3. Place 2 heaped tablespoons of mixture onto lightly greased oven trays. Leave about 5cm between each cake to allow them to spread slightly.
  4. Sprinkle cakes with a little extra sugar if desired. Bake in moderately hot oven for about 15 minutes or until lightly browned. Use metal spatula to loosen cakes on trays; cool on trays.

Thursday, July 8, 2010

23 Weeks Pregnant


23 weeks today and to be honest not much has changed in the last week. I have thoroughly cleaned the nursery - scrubbed the walls, cleaned the mirrors, cleaned the cupboard and mopped the floor. I also have picked out some things that I want to buy from Ikea once I have some money again. I think my next step is to make a list of general baby items that I need - I don't think it will be a very big list, but there are a few things like a monitor, car seat, pram, etc. Hopefully I can grab most of those things on sale or off of ebay.

Bubs is still pretty quiet in there - I feel a few kicks a day but not too many. I am feeling really good still - not too big or tired, just happily pregnant :)

Only 17 more weeks until I meet my new daughter!

Tuesday, July 6, 2010

Apricot and Coconut Muffins


Zoe and I baked these yummy muffins the other day. Well really I baked, and Zoe played with an unopened packet of sugar, and did some pretend stirring with a bowl and a fork. She seemed to really enjoy it, and loved listening to me count out the number of cups of flour, sugar, etc. There was lots of singing too - "this is the way we stir the muffins, stir the muffins, stir the muffins" - on repeat. All in all it was a very fun time and I'll definitely be baking nice easy recipes with Zoe more often. So if you have a young one and a rainy day give these muffins a try - they are easy, fun and delicious!


Apricot and Coconut Muffins (from The Australian Women's Weekly Kids Cooking)
Makes 12

425g can apricot halves
2 1/4 cups self-raising flour
3/4 cup brown sugar
1 egg
160ml buttermilk
125ml vegetable oil
1/3 cup apricot jam

Coconut topping
1/4 cup plain flour
1 tbsp caster sugar
1/3 cup shredded coconut
30g butter
  1. Preheat the oven to moderate. Grease 12-hole muffin pan. Drain apricots; discard syrup, then chop apricots coarsely.
  2. Make coconut topping.
  3. Combine flour and sugar in large bowl; use a fork to stir in apricot, then combined egg, buttermilk, oil and jam. Mixture should look lumpy, do not overmix.
  4. Divide mixture among prepared pan holes; sprinkle coconut topping over each muffin mixture. Bake, uncovered, in moderate oven about 25 minutes. Stand muffins in pan 5 minutes; place top-side up on wire rack to cool.
  5. Coconut topping: Combine flour, sugar and coconut in small bowl; use fingers to rub butter into flour mixture.


Here is the little miss trialing the coconut topping. She called it cheese, I guess it kind of looked like grated cheese. She loved it!

Saturday, July 3, 2010

Vote time!

The next sweet for the 20 Sweets in 20 Weeks project is...


Drop Cookies

And your choices are...

Coconut & Cherry Macaroons

Chewy Chocolate

Pumpkin & Cranberry


So what are you waiting for? Get voting now!

Friday, July 2, 2010

20 Sweets in 20 Weeks - #3 Caramel Layer Cake


Are you ready for an absolute sugar overload? If you answered yes then read on this recipe is full of sugar and is so sweet! Even I the world's biggest sugar lover thought it was just a wee bit too sweet - but hey it hasn't stopped me from eating it. What is especially wonderful about this recipe is the cake itself - a lovely light texture, not too crumbly and super easy to make - I love it, and I hope you do too.


Yellow Cake (from Southern Cakes by Nancie McDermott)
Serves 8 to 10

3/4 cup butter
1 cup milk
2 cups sifted all-purpose flour
2 3/4 tsp baking powder
1/2 tsp salt
4 eggs
2 cups sugar
1 tsp vanilla extract
  1. Preheat the oven to 325F. Grease and flour 2 9" round cake tins. (I used 2 8" tins)
  2. Combine the butter and milk in a small saucepan, and cook over low heat until the butter melts. Stir well and set aside to cool to room temperature.
  3. Combine the flour, baking powder and salt in a medium bowl, and stir with a fork to mix well.
  4. In a large bowl, combine the eggs and sugar, and beat well at high speed, scraping down the bowl often, until light yellow, smooth, and thick.
  5. Stir the flour mixture into the egg mixture, mixing only until the flour disappears. Add the cooled milk mixture and the vanilla, and divide the batter between the prepared pans.
  6. Bake for 25-30 minutes, until the cakes are a pale golden brown, spring back when touched lightly in the center, and begin to pull away from the sides of the pans. (Mine baked for 45 minutes)
  7. Cool in the pans for 10 minutes on wire racks. Then turn out the cakes onto wire racks to cool completely, top side up.
  8. I halved each cake again to make 4 layers of cake and 3 layers of icing.

Caramel Icing (I ended up making 1.5 times the mixture to get enough for the extra 2 layers of icing)

2 2/3 cups brown sugar
1/2 cup butter
7 tbsp evaporated milk
1 tsp vanilla extract
  1. In a heavy medium saucepan, combine all of the ingredients. Bring to a boil over medium-high heat. Stir well and then adjust the heat so that the frosting boils and bubbles gently. Cook for 7 minutes. Remove from the heat and let cool for 5 minutes.
  2. Beat the warm icing with a wooden spoon until it thickens, 2-3 minutes.
  3. Quickly spread the icing over the bottom layer of cake, then position the next layer and ice again, continue until all layers of the cake are in position. Then ice the top and side of the cake.
  4. If the icing becomes too hard to spread warm gently over low heat, add a spoonful of evaporated milk, and then scrape and stir well until the icing softens enough to spread again. Dip a table knife in very hot water to help soften and smooth out the icing once it is spread.

Thursday, July 1, 2010

22 Weeks


22 weeks pregnant today - and time is flying by now. I can't believe that I am already over the half way mark, it won't be long now until I get to meet my gorgeous baby girl.

This week bubs has been doing gymnastics in my belly, my mum even saw my belly move the other night - so definitely some big kicks going on.

I am feeling really good at the moment - got to love the second trimester - not too tired, not too big but definitely feeling pregnant. I love this stage of the pregnancy.

I am thinking of getting stuck into the nursery in the next week. I want to have it all done sooner rather than later - as I know when I start to get bigger that I might not feel like scrubbing walls and cleaning mirrors. I've also got lots of baby clothes, wraps and nappies to wash - can't wait to hang out all of the cute little things!

Monday, June 28, 2010

20 Sweets in 20 Weeks - #2 Chocolate Cut-Out Cookies


Oh dear - as you can see this recipe did not go to plan.

I was so sure that the freezing and refrigerating of the dough would produce perfectly shaped cookies, but sadly I was wrong. I think it has a lot to do with the oven in my new house - methinks I need to get an oven thermometer to see what is going on in there. I think it is far hotter than what the temperature dial says and therefore it totally melted the butter in these cookies before they got a chance to bake properly.

Luckily they still tasted quite good - albeit a bit crispy. But nice and chocolately and not too sweet. Oh and in case you were wondering the cookie up the top is supposed to be a flower and the one below a cow - it looks like the cow is transforming into a bison!


Chocolate Cookies (from Confetti Cakes for Kids by Elisa Strauss)
Makes approximately 12 x 3 inch cookies

11 ounces all-purpose flour
1/4 tsp salt
1/2 tsp baking soda
6 ounces bittersweet chocolate, chopped
8 ounces unsalted butter
8 ounces granulated sugar
1 large egg
1 tsp vanilla extract
  1. In a medium bowl, sift together the flour, salt and baking soda. Set aside.
  2. Melt the chocolate either in a double boiler over medium heat or in the microwave in 15 second increments.
  3. In the bowl of a standing mixer with a paddle attachment, combine the butter and sugar and beat on medium speed until light and fluffy. Add the egg and vanilla and beat until combined.
  4. Set the mixer to low speed and add the melted chocolate.
  5. Add the flour mixture in 2 batches, scraping down the bowl after each addition. Beat until the dough just comes together, being careful not to overmix.
  6. Turn out the dough onto a lightly floured surface. Form the dough into a bowl, wrap it in plastic and refrigerate for 30 minutes.
  7. Place the dough between 2 pieces of parchment paper and roll out to 1/4 inch thick. Transfer the dough to the refrigerator and chill for at least 1 hour.
  8. Cut out cookies in the desired shapes and place at least 1 inch apart on a half-sheet pan lined with parchment paper or an ungreased nonstick cookies sheet. Transfer to the refrigerator and chill for at least 15 minutes or until they are stiff.
  9. Preheat the oven to 350 F.
  10. Bake until the cookies are firm to the touch, about 10 minutes.
  11. Let the cookies cool completely before decorating.
And what did Zoe think of these cookies you may ask...


She definitely approves :)

Sunday, June 27, 2010

Sunday Breakfast - French Toast


So now that my mum lives next door to me and she has three lovely chickens it only makes sense that breakfast time should use up some of those lovely fresh eggs. The treat for today - french toast. Could there be a more scrumptious way to start the day?

French Toast (from Survival for the Active Family - Australian Institute of Sport)
Serves 4

2 eggs
1/3 cup milk
1 tbsp brown sugar
pinch nutmeg
oil for cooking
4 slices bread (I used raisin toast)
strawberries, to serve
maple syrup, to serve
  1. Combine eggs, milk, sugar and nutmeg in medium mixing bowl.
  2. Heat oil in a medium non-stick frying pan over medium heat.
  3. Soak bread slices one at a time in egg mixture until saturated.
  4. Cook slices for 2 minutes each side.
  5. Serve with strawberries and strawberries.
Enjoy!

Friday, June 25, 2010

Organising the Nursery


Now that I know I have a little girl on the way I think I am going to start organising the nursery. Even though things are up in the air with Mat and I, I hate feeling unorganised and so I will get things ready to ease my stress levels.

As you can see the room is currently a huge dirty mess. I have got a large task ahead of me indeed. So these are my before photos and hopefully over the coming weeks I will be posting the progress shots and the final room.


Unfortunately because I am renting I won't be able to paint the walls so I am stuck with the purple walls. Lucky I am having a girl I guess!

Okay so this is my list of things to do...

Cleaning
  • Scrub the walls
  • Clean the window and window sill
  • Clean the inside of the built-in wardrobe
  • Clean the mirrored doors of the wardrobe
  • Clean over all of baby girl's furniture - bassinet, change table, pram, bouncinet, large play equipment and baby bath
  • Wash the baby clothes
Purchases
  • Change mat covers
  • Mobile for change table
  • Little table/set of drawers
  • Lamp
  • Monitor
  • Storage organisers for the wardrobe for baby girl's clothes/linen/etc
  • Rug

I am not sure what kind of art work I want to hang on the walls yet. But I might just have to get crafty and make some wall art.

Any other ideas on how to make this little nursery more nice and cosy?

Thursday, June 24, 2010

Jelly Bean at 21 Weeks


I can't believe that I am 21 weeks pregnant already, the time is seriously just flying by! Before my last scan I was quite nervous and worried because I hadn't felt much movement from the little one and everyone told me that you should feel the second one quicker. Luckily though it just turns out that my placenta is positioned at the front this time, making it far more difficult to feel the little kicks from my baby girl.


It seems that baby girl is going well in there, she is measuring slightly large, has a nice strong heart beat, has 10 fingers, 10 toes and all the bits. She is perfect! And I am over the moon to know that my baby is going so well.

Now the next time I see her will be when she is born - not long to go now! I better start getting the nursery ready.

Oh and if you are wondering this is how I am looking at 21 weeks pregnant - not too big yet, but there is a lot of room to grow...