Showing posts with label food. Show all posts

Friday, March 11, 2011

20 Sweets in 20 Weeks - #14: Death by Chocolate Cupcakes

Death by Chocolate Cupcake

Before we talk baking I have to say thank you everyone for your kind words and support in regards to my post on post natal depression. It has been so wonderful reading through all of your lovely comments, knowing that I am not alone in this and that the blogging community is always there to give me big virtual hugs. It is funny, since I wrote that post I have actually started to feel a lot better in general - like a huge weight has been lifted from my shoulders. So thank you everyone for listening and not judging.

Now on to the cupcakes. First of all - why is it that each week the sweet that I want to win the poll never makes it. I was really hoping to make a Cherry Ripe cupcake! Sheesh! But seriously I was kind of hoping that Death by Chocolate wouldn't win because I'm not actually that big a fan of chocolate. So of course it did win - Murphy's law!

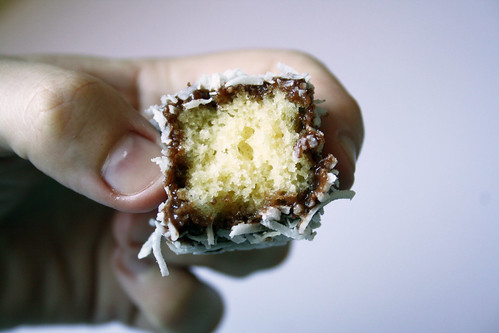
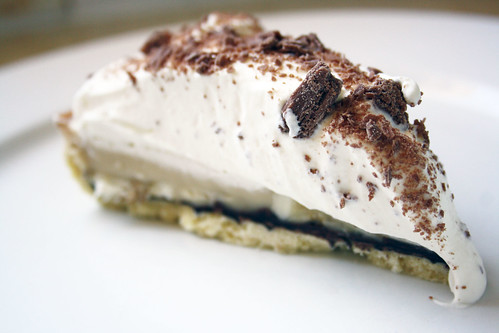
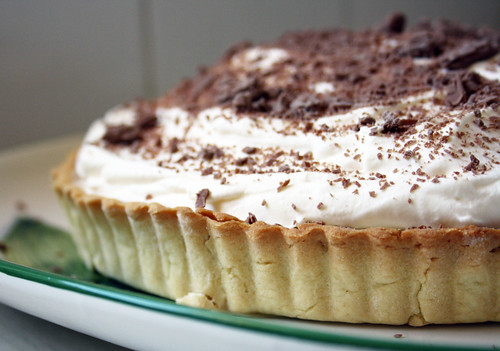
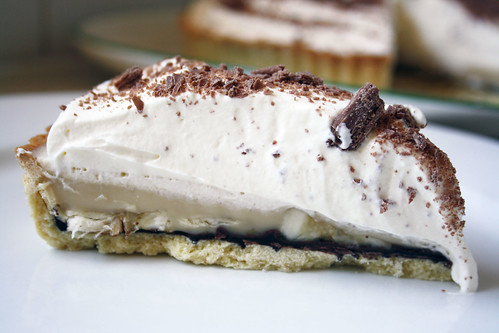
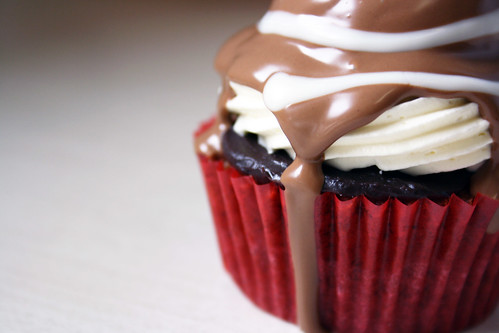
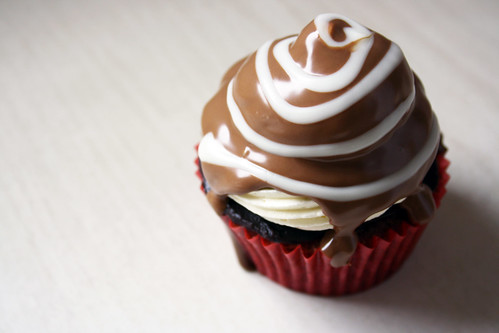
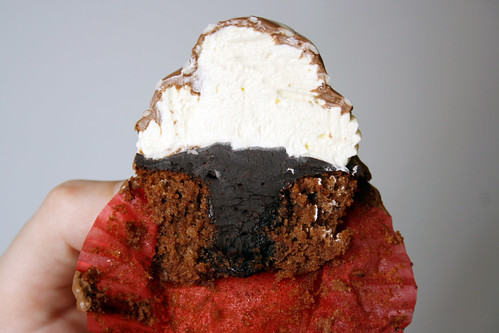
These cupcakes are quite devilish - a moist chocolate buttermilk cake filled and topped with dark chocolate ganache, then a swirl of white chocolate swiss meringue buttercream and finally drizzled with milk and white chocolate. Wowsers - that is a lot of chocolate! I had quite a few taste testers for these cupcakes because I brought them to a dinner party - and they were definitely a hit. So if you or someone you know are a chocolate lover you should definitely give these cupcakes a try.

Death by Chocolate Cupcake

Chocolate Buttermilk Cake (from The Australian Women's Weekly - Classic Cakes)
Makes 24 cupcakes

180g unsalted butter, softened
1 tsp vanilla extract
330g caster sugar
4 eggs, separated
110g self-raising flour
35g cocoa powder
180ml buttermilk
  1. Preheat oven to 180C. Line 2 12-hole muffin trays with cupcake papers.
  2. Beat butter, extract and sugar in a small bowl with electric mixer until light and fluffy. 
  3. Beat in egg yolks, one at a time, until just combined.
  4. Transfer mixture to large bowl, stir in sifted dry ingredients and buttermilk.
  5. Beat egg whites in clean small bowl with electric mixer until soft peaks form, fold into cake mixture in two batches.
  6. Divide mixture into cupcake papers and bake for approximately 20 minutes (or until a skewer comes out clean). Note: my oven is not tip-top so your cupcakes make bake quicker/slower.
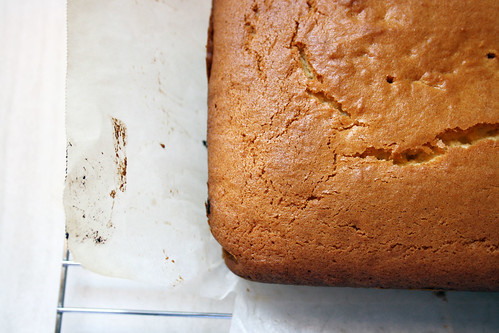
  7. Allow to cool slightly in muffin trays and then move to a wire rack to cool.
Death by Chocolate Cupcake

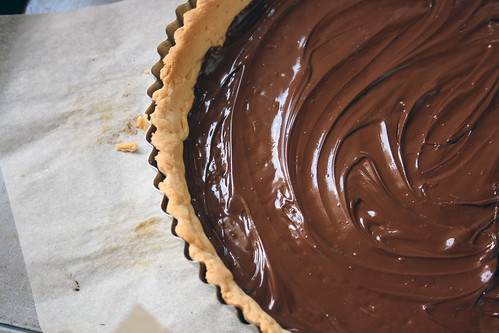
Dark Chocolate Ganache

226g dark chocolate, in small pieces
2/3 cup thickened cream

  1. Place chocolate into a bowl.
  2. Bring cream to boil in a small saucepan, remove from heat immediately and pour over chocolate.
  3. Stir until chocolate melts.
  4. Place ganache in fridge and stir every 10 minutes until you reach a good piping consistency.
Death by Chocolate Cupcake

White Chocolate Swiss Meringue Buttercream

Follow the directions for Almond Swiss Meringue Buttercream, but omit the vanilla extract and almond essence, and instead add 200g of melted white chocolate that has been slightly cooled.

Assembling the Cupcake

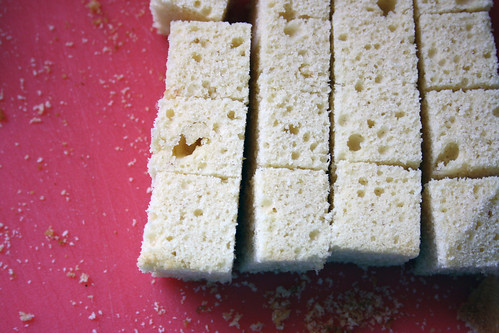
  1. Cut out a well in each cupcake (eat the cut out piece :D).
  2. Fill the well with dark chocolate ganache (I piped in the ganache).
  3. Smear a layer of dark chocolate ganache on the top of the cupcake.
  4. Pipe a swirl of white chocolate swiss meringue buttercream on top.
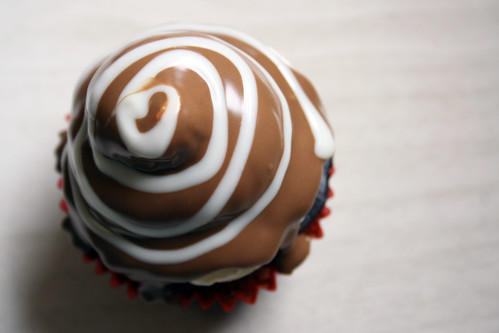
  5. Melt 200g of milk chocolate, cool slightly and then coat the buttercream on each cupcake.
  6. Melt 100g of white chocolate, cool slightly, place in a piping bag and swirl onto the milk chocolate on top of each cupcake.
Zoe and Cupcake

Wednesday, March 2, 2011

20 Sweets in 20 Weeks - #13: Red Velvet Whoopie Pies

Red Velvet Whoopie Pie

I first attempted making Red Velvet cake back in 2009 and I think it is safe to say that it was deemed a failure. I think I must have put to much baking powder in those cupcakes because they were extremely bitter. So when Red Velvet won the poll this week I was happy to be giving it another shot, but I was also worried that I would fail again. Luckily those worries were unfounded. I have now successfully made Red Velvet cake, in the form of whoopie pies!

That being said - I think I'm not a massive fan of Red Velvet cake - the flavour is a bit so-so to me, it just isn't sweet enough, or chocolatey enough, or anything really. But my goodness it sure does look pretty. In fact it looks out of this world! The bright red cake with the white cream cheese filling looks divine. And on another positive note my mum officially loved these whoopie pies - she said for her it was a flavour explosion - I guess we must have very different tastebuds? Who knows.

Anyways if you want to make some pretty whoopie pies and you want a 'not too sweet' cake then give these a try - they were extremely easy to make and very pretty to look at.

Red Velvet Whoopie Pie

Red Velvet Whoopie Pies (from Annie's Eats)
For the cookies:
2 cups plain flour
2 tbsp cocoa powder
½ tsp baking powder
¼ tsp salt
8 tbsp unsalted butter, at room temperature
1 cup brown sugar, packed
1 large egg
1 tsp vanilla extract
½ cup buttermilk, at room temperature
1 oz red food coloring

For the frosting:
8 oz cream cheese
5 tbsp unsalted butter, at room temperature
2 tsp vanilla extract (I only used 1 tsp)
2½ cups icing sugar, sifted
  1. Preheat the oven to 375˚ F and line 2 baking trays with baking paper.
  2. In a medium bowl, whisk together the flour, cocoa powder, baking powder and salt.  
  3. In the bowl of a stand mixer fitted with the paddle attachment, cream together the butter and brown sugar on medium-high speed until light and fluffy, about 2 minutes.  Beat in the egg until incorporated, scraping down the sides of the bowl as necessary.  Blend in the vanilla.  
  4. With the mixer on low speed, beat in about a third of the dry ingredients, followed by half of the buttermilk, beating each addition just until incorporated.  Repeat so that all the buttermilk has been added and then mix in the final third of dry ingredients.  Do not overbeat.  
  5. Blend in the food coloring.
  6. Annie piped hers to make heart shaped whoopie pies - I just used an ice-cream scoop to scoop out the batter on to the baking paper. 
  7. Bake for 7-9 minutes or until the tops are set, rotating the baking sheets halfway through (mine were a bit larger so I baked for 15 minutes).
  8. Allow the cookies to cool on the baking trays  at least 10 minutes, until they can be easily transferred to a cooling rack.  
  9. Repeat with any remaining batter.  
  10. Allow cookies to cool completely before proceeding.
  11. To make the cream cheese frosting, in the bowl of a stand mixer fitted with the paddle attachment beat the cream cheese and butter on medium-high speed until well combined and smooth, about 2-3 minutes.  Mix in the vanilla extract.  Gradually beat in the icing sugar until totally incorporated, increase the speed and then beat until smooth.
  12. Annie used a piping bag to pipe the cream cheese frosting on between two of the cookies - I just used a knife to spread it on through sheer laziness
  13. Once you have piped/spread on the cream cheese frosting on to the bottom of one cookie - sandwich it with another cookie - and voila! You are done. Now just repeat for the rest of the whoopie pies.

Red Velvet Whoopie Pie

Wednesday, February 23, 2011

20 Sweets in 20 Weeks - #12: Apple & Cinnamon Slice

Apple & Cinnamon Slice

So we are up to number 12 in the 20 Sweets in 20 Weeks project - definitely over the half way mark and I am started to get excited about finishing this little project up. I have the next 8 sweet genres planned out - and let me tell you, there is still a lot of sweet goodies to come your way.

Anyway on to the baked slice - this was a close call between lemon & coconut, and apple & cinnamon. Secretly I was hoping that lemon & coconut would win, but I am still happy with the result. This slice is extremely easy to make since you get to cheat a bit by using a packet of cake mix for the base. The bottom is nice and crunchy thanks to the added coconut, and the canned apple & sour cream make for a lovely moist top to the slice, which is then finished off with cinnamon sugar. Such a simple slice with simple flavours that you just know are going to work together. Why not give it a try?

Apple & Cinnamon Slice

Apple and Cinnamon Slice (from taste.com.au)
Serves 8

340g packet golden buttercake mix
90g desiccated coconut
125g unsalted butter, melted
400g can apple pieces
300g sour cream
1 tsp cinnamon sugar
  1. Preheat the oven to 180°C. Grease a 20cm square cake pan. Line base and the two opposite sides with baking paper, extending the paper 5cm over edge of pan.
  2. Combine cake mix, coconut and butter in a medium bowl. Press mixture evenly over base of prepared pan. Cook for 15 minutes, or until lightly browned. Cool slightly.
  3. Spread apple evenly over base, then spread sour cream evenly over apple and sprinkle with cinnamon sugar. Cook for further 20 minutes, or until sour cream has set.
  4. Cool in pan. Cut the slice into fingers to serve.
Apple & Cinnamon Slice

Wednesday, February 16, 2011

20 Sweets in 20 Weeks - #11: Golden Syrup and Chocolate Buns

Golden Syrup and Chocolate Buns

For some reason I have always been afraid of yeast. Kind of ridiculous right? I thought it would be hard to get it right, that it wouldn't rise and instead I would end up with a little dense rock instead of a delicious baked goodie. Well I was wrong - very wrong!

This was my first ever experiment with yeast and I have to say that not only was it extremely easy, but it also tasted fantastic and I really enjoyed making it. I loved watching the yeast froth up in the warm milk, the smell of the yeast in the kitchen, seeing my dough double in size, kneading the dough to release a bit of an extra stress and then putting it all together. Actually I thoroughly enjoyed the whole process.

And to top it off I think these buns taste wonderful - the dough is light and fluffy, the dark chocolate and brown sugar add a lovely richness to the bun and the golden syrup produces a nice sticky mess. These buns were seriously finger licking good. So if you are like me, and have been afraid to break out the yeast, fear no more - try out this recipe and I promise you won't be disappointed.

Golden Syrup and Chocolate Buns

Sticky Golden Syrup and Chocolate Buns (from taste.com.au)
Makes 8

375ml warm milk
3 tsp dried yeast
1 tbs caster sugar
600g plain flour
1/2 tsp salt
1 egg, lightly whisked
80g butter, melted
70g brown sugar
100g dark chocolate, coarsely chopped
125ml golden syrup
    1. Combine the milk, yeast and caster sugar in a small bowl. Set aside for 5 minutes until frothy.
    2. Combine the flour and salt in a large bowl. Make a well in the centre. Pour the milk mixture and egg into the well; stir until well combined. Cover with plastic wrap; set aside for 45 minutes or until dough doubles in size.
    3. Preheat oven to 200°C. Brush a 22cm round cake pan with butter and line the base and side with baking paper. 
    4. Turn dough onto a floured surface; knead for 5 minutes or until smooth and elastic. 
    5. Use a rolling pin to roll to a 30x40cm rectangle. Brush with one-third of the butter; sprinkle with one-third of the sugar and chocolate. Fold a short side of dough over two-thirds of the filling. Fold remaining one-third over the top to enclose filling. 
    6. Roll the dough out to a 30x40cm rectangle. Brush with half the remaining butter; top with half the remaining sugar and chocolate. Repeat folding and rolling. Repeat filling with remaining butter, sugar and chocolate; drizzle with half the golden syrup. 
    7. Roll up dough from a long side to enclose filling. Cut crossways into 8 pieces. Arrange, cut-side up, in prepared pan. Cover with plastic wrap; set aside for 15 minutes to rise.
    8. Drizzle over remaining golden syrup. Bake in oven for 5 minutes. Reduce oven to 180°C and bake for 25 minutes or until golden brown and cooked through. 
    9. Set aside for 10 minutes before turning onto a wire rack. Serve warm or at room temperature.
    Golden Syrup and Chocolate Buns

    Saturday, February 12, 2011

    Frog in the Pond

    Frog in the Pond

    Lately we have had some hot days down here in Adelaide and this little house of mine can't take the heat. We have one small wall air-conditioner in the study/play room and that is it. So while this room turns into a freezer, the other rooms in the house are like saunas. Especially poor little Zoe's room - it must be the hottest room of all. I seriously don't know she manages to sleep in there on our really hot days, the air gets so thick you could cut it with a knife.

    So feeling sorry for my little lady I decided to give her a little treat for dessert a week or so ago - and what better way to treat a toddler than with a frog in the pond? Nice cold jelly with a chocolate treat to boot.

    Frog in the Pond
    Makes 2

    1 packet of jelly (either lime green or blue blueberry)
    2 chocolate frogs
    1. Make jelly according to the directions on the packet.
    2. Once jelly is set divide into two bowls.
    3. Add a chocolate frog to each.

    And since I'm sure there are many more hot summer days to come - any tips for keeping an old house cool? Or how to keep your baby and toddler cool?

    Wednesday, February 9, 2011

    20 Sweets in 20 Weeks - #10: Banana Sundae

    9 Cream and Cherry

    So I remember saying that this was going to be the ultimate banana sundae - but perhaps it isn't the ultimate - more like an average kinda banana sundae. I had all these hopes and dreams for the most amazing banana sundae ever, but when it came the day to make it - let me just say I had some issues. They weren't food issues that I was having - it was more like screaming children issues. So in the end it was all very rushed - it wasn't as pretty as I wanted, the photos were cruddy and I didn't get to make it all fancy-schmancy. All that being said I did manage to make a banana sundae that consisted of 12 layers of evilness, and while it may not be the ultimate banana sundae I still thoroughly enjoyed eating it.

    12 All gone

    Not the Ultimate Banana Sundae
    Makes 1

    Bottle of chocolate topping
    One banana, sliced
    Mini marshmallows
    Good quality vanilla ice-cream, slightly softened
    M&M's
    Whipped cream
    Glace cherry
    1. Grab an old-fashioned milkshake glass. 
    2. Pour a little bit of chocolate topping into the bottom.
    3. Add a few slices of banana.
    4. Add a very small handful of mini marshmallows.
    5. Add a small scoop of ice-cream and squish it into the glass.
    6. Pour on a little more chocolate topping.
    7. Add a few more slices of banana.
    8. Add a very small handful of M&M's.
    9. Add another small scoop of ice-cream and squish it into the glass.
    10. Add a few more slices of banana.
    11. Add enough ice-cream to nearly fill the glass, again squish it in.
    12. Add some more mini marshmallows and M&M's.
    13. Top with whipped cream and the glace cherry.
    14. Consume.

    1 Sliced Banana
    Slice up your banana.

    2 Sundae Glass
    Grab your glass.

    3 Choc and Banana
    Add chocolate topping and banana.

    4 Marshmallows
    Some mini marshmallows.

    5 Ice Cream
    Pack down the ice-cream.

    6 MandMs
    Add chocolate topping, banana and M&M's.

    7 Layers
    More ice-cream and banana.

    8 More
    More marshmallows and M&M's - why the hell not?

    10 Done
    Top with a ridiculous amount of whipped cream and a glace cherry.

    11 Eat
    Eat it!

    And just out of curiousity - if you were making the ultimate banana sundae what would you put in it?

    Wednesday, February 2, 2011

    20 Sweets in 20 Weeks - #9: Slice and Bake M&M Cookies

    m&m cookies

    I couldn't believe it when we had a draw with last week's poll - 12 votes for glazed lemon and 12 votes for M&M's. I had to make the executive decision and since I am trying to lose weight I decided that I should make the ones that Zoe was more likely to want for her morning tea, in the hopes that would stop me from eating them all. And so I decided upon M&M's - and just as a side note they are named M&M's after the initials of the owners of the recipe/company Forrest Mars Sr. and R. Bruce Murrie. So there you go.

    Now on to the cookies. These were really easy to make, the dough took about 5 minutes to put together and then I just left it in the fridge overnight, sliced it up the next day, baked and voila! Done. Unfortunately though I am not a huge fan of these - I don't mind the taste so much, I mean who can say no to M&M's. But the texture of these cookies I am not a fan of. I don't really know how to describe it other than a bit chalky - if that makes any sense at all. Zoe seems to like them though - so I guess that is the most important thing. Oh, and I also discovered that a very small handful of M&M's is a good way to make a toddler very happy and busy for quite some time. So without further ado, the recipe...

    Lots of m&m cookies
     
    Slice and Bake M&M Cookies (from The Australian Women's Weekly - Cookies)
    Makes 48

    250g unsalted butter, softened
    200g icing sugar
    1 tsp vanilla extract
    300g plain flour
    75g rice flour
    50g corn flour
    70g mini M&M's (I used 150g of normal size M&M's instead)
    2 tbsp milk
    1. Beat butter, sifted icing sugar and extract in small bowl with electric mixer until light and fluffy. Transfer to large bowl; stir in sifted flours and M&M's, in two batches, then milk.
    2. Divide mixture in half. Knead each half on floured surface until smooth, then roll each half into 25cm logs. Wrap each log in baking paper; refrigerate about 1 hour or until firm (I left mine overnight).
    3. Preheat oven to 160C. Grease oven trays; line with baking paper.
    4. Cut the logs into 1cm slices; place about 3cm apart on oven trays. Bake about 20 minutes. Cool on wire racks.
    What is in there?
     Cookie dough all wrapped up.

    Cookie Dough
    Pretty M&M colours in the cookie dough.

    Sliced Cookie Dough
    Sliced cookie dough waiting to be baked.

    Lots of m&m cookies
    The end result - M&M cookies.

      Wednesday, January 26, 2011

      20 Sweets in 20 Weeks - #8: Strawberries and Cream Tart

      Strawberry and Cream Tart

       Stop the press. I think I have found a new favourite dessert. I have always called lemon cheesecake my favourite dessert, but now that I have tasted this divine strawberries and cream tart - I think the cheesecake's days are numbered. The texture of the filling is so light, smooth and creamy, and then the strawberries on top covered in sweet sticky jam perfectly finish off this tart. I would have to say that it is a perfect summer dessert (and yes it is summer down here in Australia :P).

      Now because I am true and honest blogger I have something to tell you, and well, this is hard for me to say, but... I used a store bought tart case. I know there is no excuse for not making the pastry myself, but this week has been a bit chaotic and quite frankly I just couldn't be bothered. So there is my dirty little secret. And now that the secret is out I feel a lot better. Also if you are feeling lazy like me that makes this the perfect dessert for you - just buy a tart case, quickly whip up the filling and top with strawberries and jam. Couldn't be easier!

      Strawberries and Cream Tart (from taste.com.au)
      Serves 6 
      1 1/3 cups plain flour
      2 tablespoons caster sugar
      90g butter, chilled, chopped
      1 egg
      250g cream cheese, softened
      1/2 cup sour cream
      1/2 cup icing sugar
      1 teaspoon rum (I used 1 teaspoon of honey instead)
      500g small strawberries, hulled (I used large strawberries hulled and cut in half)
      1/4 cup strawberry jam, warmed
      1. Process flour, caster sugar and butter in a food processor until mixture resembles fine breadcrumbs. Add egg. Process until pastry just comes together.
      2. Turn onto a lightly floured surface. Knead until smooth. Press into a 10cm (diameter) disc. Wrap in greaseproof paper. Refrigerate for 20 minutes.
      3. Place a baking tray into oven. Preheat oven and tray to 200°C. Roll out pastry on a floured surface to a 5mm-thick round. Line a 3cm deep, 19cm (base) loose-based tart pan with pastry. Refrigerate for 5 minutes.
      4. Line pastry case with baking paper. Fill with raw rice. Place onto hot baking tray. Bake for 10 minutes or until edges are light golden. Remove baking paper and rice. Bake for a further 8 to 10 minutes or until pastry case is light golden. Set aside to cool.
      5. Using an electric mixer, beat cream cheese, sour cream, icing sugar and rum until smooth. Spread mixture in cold pastry case. Top with strawberries. Brush with warm jam. Cover. Refrigerate overnight. Serve.
      Tart Case

      Me cheating with a store bought tart case.
      Tart Filling
      Add the filling.

      Cut Strawberries

      Cut up the strawberries.

      Strawberry and Cream Tart

      Arrange the strawberries on top of the filling.

      Strawberry and Cream Tart

      Finish by brushing with warm jam - voila!

        Tuesday, January 25, 2011

        20 Sweets in 20 Weeks - Voting Time!

        I am going to post up the Strawberry and Cream Tart recipe tomorrow, but in the mean time why don't you take a moment to vote for next week's sweet treat...

        C is for Cookie..


        Slice and Bake Cookies!

        Glazed Lemon

        Cranberry & White Chocolate

        M&M's


        You know what to do - get voting!

        Saturday, January 22, 2011

        Lamingtons

        Lamingtons

        If you are a fellow Aussie you know all about lamingtons and how awesome they can be - but if you live else where you may not have experienced these little wonderful cakes. Just imagine mini sponge or butter cakes dipped in chocolate and coated in coconut - seriously one of the best flavour combinations of all time.

        Lamington


        Lamingtons (from the Australian Women's Weekly - 100 Favourite Cakes)
        Makes 24

        Cake:
        4 oz unsalted butter, softened
        1 tsp vanilla extract
        3/4 cup castor sugar
        2 eggs
        2 cups self-raising flour
        pinch salt
        1/2 cup milk

        Chocolate Icing and Coconut Topping:
        1 lb icing sugar
        1/3 cup cocoa
        1/2 oz unsalted butter
        1/2 cup milk
        3/4 lb shredded coconut

        Cake:
        1. Grease and line a lamington tin (11 in x 7 in). Preheat the oven to 180 C (350 F).
        2. Beat butter and vanilla together until white, add sugar, beat until light and creamy. Add eggs one at a time, beating well after each addition.
        3. Fold in sifted dry ingredients alternately with the milk. When all the ingredients are added, beat mixture lightly until smooth.
        4. Spoon mixture into lamington tin, bake in oven for 30 minutes. Cake is done when firm to the touch and a skewer inserted comes out clean. Cool slightly before turning the cake out on to a wire rack to cool completely.
        Icing:
        1. Sift icing sugar and cocoa into heatproof basin, or into top half of double saucepan. 
        2. Add softened butter and milk, stir with a wooden spoon to mix thoroughly.
        3. Stand over hot water, stir constantly until icing is of good coating consistency.
        4. Keep icing over hot water while dipping lamingtons. If icing becomes too thick, add a little extra warmed milk or water. 
        Putting it all together:
        1.  Thinly trim brown top, base and sides from cake. 
        2. Cut cake into 24 even pieces.
        3. Hold each piece of cake on a fork. Dip each cake in chocolate icing, then toss in coconut.
        4. Stand on wire rack until icing sets.
        Butter Cake batter

        The butter cake batter ready to bake.

        Butter Cake

        The baked cake.

        Cubes of cake

        Individual pieces of cake.

        Lamington

        Delicious lamington!


        Why not give it a try? I promise you will love this one!

        Wednesday, January 19, 2011

        20 Sweets in 20 Weeks - #7: Banana Cream Pie

        Banana Cream Pie

        I have been dreaming of eating banana cream pie for some time now. I think I have only had it once before and that was in 2006 when I visited Hawaii (which was great fun by the way). I really think that America seems to be the place to be when it comes to pies. Australia's pie selection just seems so boring in comparison - we seem to do apple pie and lemon meringue pie and not a hell of a lot more. 

        Funnily enough I actually got this recipe from an Australian cookbook and it turned out pretty well. I like the banana cream filling and of course who can complain with loads of whipped cream on top. But I did have some issues with this pie. First of all working with gelatine for me was a nightmare! It made the cream filling go incredibly lumpy and I ended up having to heat the whole cream mixture using a double boiler to get it back to a smooth consistency. For a while there I thought I would have to throw out the whole thing, there may have been some foul language at that stage. The second issue I had was the pastry, I may have over worked it, but I found it incredibly hard - when what I was after was a nice flaky crust. Other than that the pie is good, maybe even better than good - lets just say there was very little conversation at the dinner table while it was being consumed. 

        Banana Cream Pie

         Chocolate Banana Cream Pie (adapted from The Australian Women's Weekly - The Great Dessert Cookbook)

        Pastry:
        90g unsalted butter, softened
        1/4 cup caster sugar
        1 egg
        1 1/2 cups plain flour
        2 tbsp ground rice (rice flour)
        1/4 tsp baking powder

        Filling:
        30g unsalted butter
        2/3 cup brown sugar, lightly packed
        2/3 cup water
        1 1/4 cups milk
        3 to 4 bananas (I used 3 smallish bananas)
        1 tbsp gelatine
        2 eggs
        2/3 cup cream
        dark chocolate (approximately 150g)
        lemon juice
        extra whipped cream (I added a little bit of caster sugar to mine)
        shaved milk chocolate, to decorate

        Pastry:
        1. Cream butter and sugar; add egg, beat well.
        2. Sift flour, ground rice and baking powder, work into creamed mixture, knead well until smooth.
        3. Refrigerate for 30 minutes.
        4. Roll out pastry on floured surface to fit lightly greased 23cm pie plate. Decorate edges with trimmings, brush with water. Prick well with fork on base and round sides.
        5. Bake in hot oven (375F) for approximately 15 minutes or until lightly golden (took my oven 20 minutes); cool.
        Filling:
        1. Combine butter, sugar and half the water in a saucepan; cook, stirring until sugar is dissolved. Cool slightly, stir in milk.
        2. Soften gelatine in remaining water, dissolve over hot water; cool. Blend into milk mixture. (This is where my mixture went lumpy and gross - if this happens to you, pop the mixture into a double boiler and stir/whisk until the lumps disappear).
        3. Separate eggs, add lightly beaten egg-yolks to milk mixture; allow to cool.
        4. When beginning to stiffen slightly, fold in lightly whipped cream and softly beaten egg-whites. 
        5. Optionally at this stage melt the dark chocolate and spread over the base of the pie case. (Looking back I would probably put a layer of ganache on the base instead of just straight chocolate).
        6. Slice bananas, dip into lemon juice; reserve some slices for decoration (I didn't reserve any). Arrange remainder on base of cooked pie case.
        7. Pour cream mixture over carefully; refrigerate until set.
        8. Just before serving, decorate with extra whipped cream and reserved banana slices (I decorated with shaved chocolate instead).
        And now for some pictures of the process. The uncooked pastry case...
        Pastry Uncooked - Banana Cream Pie

        Pastry case cooked and fresh out of the oven...
        Baked Pastry - Banana Cream Pie
        Cover the pastry in melted chocolate...

        Cover in Chocolate - Banana Cream Pie

        Top with slices of banana...

        Cover with Bananas - Banana Cream Pie

        Pour over the cream mixture and refrigerate to set...

        Add Cream Filling - Banana Cream Pie

        Top with whipped cream and shaved chocolate, cut a slice and enjoy...
        Banana Cream Pie