Showing posts with label christmas. Show all posts

Friday, November 29, 2013

Our Simple Advent Calendar

Advent Calendar 2013

This year I wanted to keep our advent calendar really simple and cheap. So I decided to use some pretty Christmas card stock that I won in a giveaway a couple of years back to make little pouches.

Advent Calendar 2013

So to make my advent calendar I used washi tape, pretty Christmas card stock and number stickers. I simply folded each piece of card stock in half then taped up the two edges to make a small pouch. Then add a number to the front of the pouch - and voila! Easiest advent calendar ever! I will stick the pouches up on the wall ready for the girls to see on the morning of December 1st. Until then, it shall remain hidden in the cupboard.

Advent Calendar 2013

I'm filling these pouches with little things I found in the $2 shop (stickers, small toy animals, textas and chocolates) and with some Christmas activity ideas too - decorating the Christmas tree, visiting the Magic Cave, writing letters to Santa and going for a drive to see Christmas lights. Can't wait for December to start - so much Christmas fun to be had!

Sunday, December 26, 2010

Christmas Day

Christmas

Well Christmas has come and gone, and I have to say it was one of the best ones I have had for a while. We started the day with the usual present opening, but this was the first Christmas where Zoe was able to open up her own presents - and she had a ball discovering all of her new toys. This year she was given a whole heap of play food, a tea set, the Fisher Price Little People backyard set, wooden blocks, a play toaster, a Dora the Explorer puzzle, some In The Night Garden books, a cute green pot and the big present from me...

Christmas

A play kitchen! A very fitting present I think from a mum who loves to bake - and so far Zoe seems to think that it is pretty cool (but not as cool as her new tea set).

I gave a Grace a few rattles and some toys for the pram, not much - but she seemed pretty happy with it...

Christmas

I was given a lovely towel set and some gorgeous new coffee mugs from my mother, a beautiful sarong from my sister, a sheet set from one of my best friends and a gorgeous little guardian angel and 'Dream' sign from my other best friend. The little guardian angel already seems to be doing its job in helping little miss Grace get to sleep. Thank you Auntie Leah!

Christmas

After all of the present opening we let Zoe play while we had our Christmas brunch - ham and cheese croissants. The rest of the day was pretty relaxed with a nibbles dinner (cheeses, dips, turkish bread and oysters) outside in the glorious summer weather, and then later lots of chatting, laughter and pavlova (I'll post the recipe for that later this week).

I hope you all had a wonderful Christmas too.  What did Santa bring you?

Friday, December 24, 2010

Merry Christmas

Christmas

Tomorrow my little family will be having a quiet brunch after opening lots of presents (Zoe is going to love it) and then we will be having a relaxed dinner to finish off the day. What have you all got planned for the big day? I hope it is filled with lots of good food, love and great company.

I'll be back on Sunday to recap our Christmas day fun - in the mean time have a very merry Christmas!

Thursday, December 23, 2010

Christmas Baking - Panforte

Panforte

I have seen a lot of recipes for panforte over the years and I was always interested in giving it a go, but for some reason I never did. This year I decided it was time to finally take on the panforte challenge. I have to say that it is quite easy to make except when it comes to stirring in the hot syrup. They are not joking when they tell you to quickly mix it all together - it turns as hard as rock really, really quickly! I found it incredibly hard to stir - it definitely gave my arm a good workout. The other trouble I had was with baking it - after the allotted 45 minutes mine was no where near baked through but the top and edges were starting to brown. So I ended up having to remove it from the oven, wrap it in a few layers of aluminum foil and then bake again for around 20 minutes at around 275 F. That seemed to do the trick.

The end result is a tasty Christmas treat with lots of dried fruit and nuts, that sends a lovely honey-cinnamon aroma through the house. So what are you waiting for? Give it a try.

Panforte

Panforte
Makes 60 pieces

330g caster sugar
1 cup honey
300g plain flour
1 tsp mixed spice
1 tbsp ground cinnamon
750g mixed dried fruit
250g blanched almonds, roasted
250g hazelnuts, roasted
pure icing sugar, to dust (I didn't bother with the icing sugar)
  1. Preheat oven to 180 C. Grease and line a 30cm x 20cm cake pan.
  2. Heat sugar and honey in a heavy-based saucepan on low, stirring, until sugar dissolves. Increase heat to medium and boil until mixture reaches 115 C on a sugar thermometer. (If you don't have a sugar thermometer, drop a little of mixture into cold water - it should form a soft ball.)
  3. Meanwhile, combine flour, spices, dried fruit and nuts in a bowl. Add hot syrup and quickly mix together (really quickly!). Scrape mixture into prepared pan. Use wet hands to pat down flat. Bake for 45 minutes (see above for what I had to do to get it to bake). Cool in pan.
  4. Turn out and dust liberally with icing sugar. Cut into thin slices (warning: you need serious arm muscles to slice it).
Rating?
Me - 4/5 - I love the rich honey flavour together with the fruit and nuts.

Wednesday, December 22, 2010

Christmas Baking - Cointreau and Sponge Finger Balls

Cointreau and Sponge Finger Balls

So in my last baking post I mentioned that I would be making four Christmas treats - well scrap that. I attempted a new recipe for almond brittle rocky road and it was a complete disaster. And I mean complete. The brittle melted all of my rocky road and then it didn't set! So I was left with one soggy melted chunk of supposed rocky road, a huge mess and a grumpy attitude. Funnily enough it was a recipe from Better Homes and Gardens, which you may remember gave me a whole heap of trouble last Christmas time (see here, here, here and here). So that is it - definitely no more recipes from Better Homes and Gardens for me.

Now back to the real baking - these little balls of Cointreau and chocolately goodness are just delicious, and so easy to make! If you are short on time this Christmas but want a tasty treat to give away then this is the recipe for you.

Cointreau and Sponge Finger Balls

Cointreau and Orange Sponge Finger Balls
Makes 35

1 tbsp Cointreau
1 cup dried apricots, finely chopped
250g sponge fingers, processed until fine
1/2 cup desiccated coconut, plus extra to sprinkle
grated rind of 1/2 orange
395ml sweetened condensed milk
50g butter, melted
500g white, milk or dark chocolate, melted
  1. In a bowl, pour Cointreau over dried apricots and set aside to soak for 15 minutes.
  2. Combine apricots, sponge fingers, coconut, orange rind, condensed milk and butter in a bowl to form a soft mixture. Form small balls, and allow to set in the fridge.
  3. Once firm, dip balls into melted chocolate and sprinkle with extra coconut. Chill until set.

Rating?
Me - 4/5 - yummy, I love the little chunks of dried apricot through them.
Mum - 4/5 - tastes just like a jaffa.

Sunday, December 19, 2010

Christmas Baking - Rum Balls

Hello again! Look at this I am actually staying true to my word and blogging again - and so soon!

Well as we all know it is that time of the year for Christmas baking and while I am not going as crazy as I did last year (see the 12 Days of Baking Days of Christmas) I am going to bake up a few goodies (four to be exact) to give to people as gifts. First on the agenda is rum balls - a classic Christmas treat that is super easy to make, great for gifting and of course tasty.

I thought I would try a new recipe this year and I while it is good, I think the recipe I used last year was better - but nonetheless I shall post the recipe up for you to peruse and I'll let you decide which you would like to make (if any).

So without further ado...

Rum Ball


Rum Balls (from some magazine - I tore out the page so now i'm not sure which)
Makes 45

400g packet digestive biscuits, broken
120g shredded coconut
125g good quality drinking chocolate
120g butter, melted
395g can sweetened condensed milk
60ml rum, or more to taste
25g good quality cocoa, to dust
1/2 cup sultanas (an extra that I decided to add)
  1. Place biscuits in a food processor and pulse until fine crumbs form. Transfer to a large bowl.
  2. Add coconut and drinking chocolate (and sultanas if you want).
  3. Stir in butter, then condensed milk. Mix well.
  4. Stir in rum.
  5. Chill for at least 30 minutes, or up to 24 hours.
  6. Roll teaspoons of mixture into small balls.
  7. Roll balls in cocoa to coat.
  8. Store in an airtight container in the fridge until ready to serve.
Rum Ball

Rating?
Me - 3/5 - I thought it was a tad dry, but otherwise yummy.
Big sis - 4.5/5 - "I like it a lot. I could eat more."

Friday, December 25, 2009

Merry Christmas!

Merry Christmas!

Here is a quick recap of the '12 Baking Days of Christmas'...


On the first day of Christmas - Jam Cookies


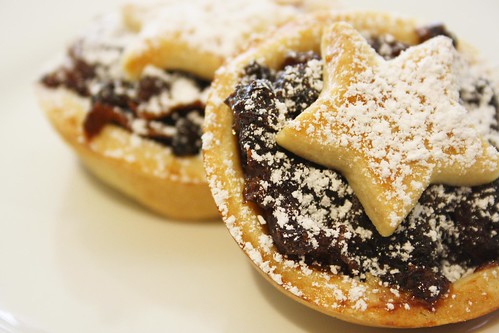
On the second day of Christmas - Fruit Mince Pies


On the third day of Christmas - Iced Lemon Cookies


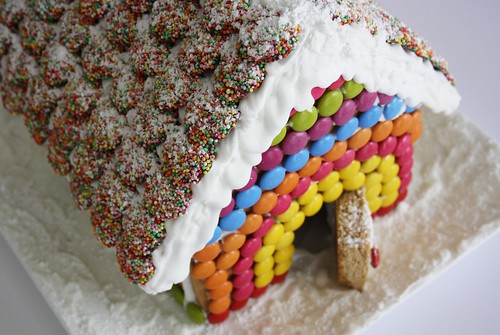
On the fourth day of Christmas - Gingerbread House


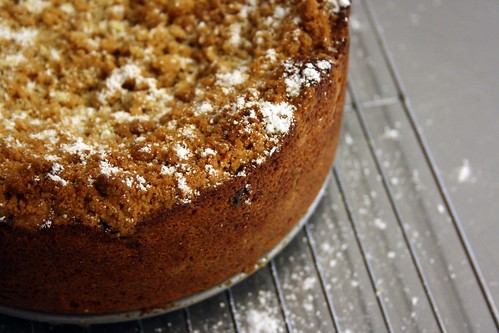
On the fifth day of Christmas - Fruit Mince Crumble Cake


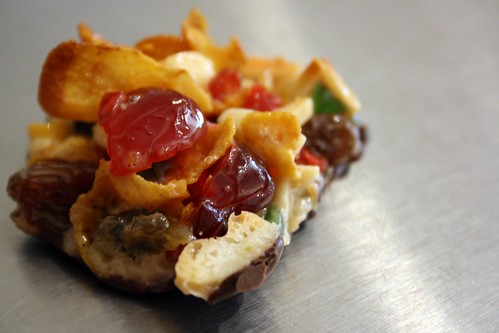
On the sixth day of Christmas - Florentines


On the seventh day of Christmas - Peppermint Bark


On the eighth day of Christmas - White Rocky Road


On the ninth day of Christmas - White Christmas


On the tenth day of Christmas - Christmas Wreaths


On the eleventh day of Christmas - Chocolate Puddings


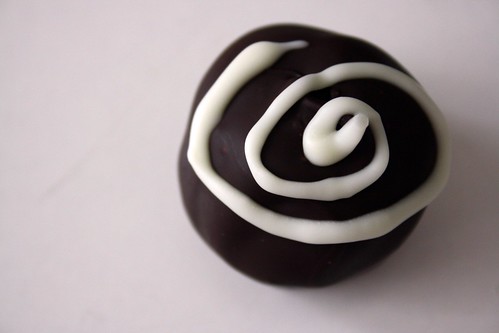
On the twelfth day of Christmas - Rum and Raisin Truffles


And with that I say goodbye - until next year! I am taking a short break and will be back with more recipes and more of Clive in the new year.

Thursday, December 24, 2009

On the twelfth day of Christmas (Rum and Raisin Truffles)

One more sleep until Christmas people - is everyone ready for Santa? Have you got the cookies and milk ready? Don't forget the carrots for the reindeer!

I think we are all ready to go, we have prepared our desserts (chocolate cheesecake, ice-cream sandwiches and some fruit mince pies), got all the ingredients for a great BBQ, put the presents under the tree and stuffed the stockings. So yes I think we are good to go.

I am going to post a round up of the 12 Baking Days of Christmas tomorrow, but in the mean time here is the last recipe in the series - rum and raisin truffles. Very easy to make, extremely decadent and again they make great gifts. Enjoy!


Rum and Raisin Truffles (unknown source)
Makes approximately 45 (I made mine larger so got about 25)

120g raisins
75g flaked almonds, toasted and chopped
1/3 cup rum
400g dark chocolate, chopped
1/2 cup thickened cream
300g dark chocolate, melted
30g copha
60g white chocolate, melted
1/2 tsp vegetable oil
1 tsp cocoa powder
  1. Combine raisins and rum in a small saucepan over a medium heat, stir until simmering. Remove from heat and set aside.
  2. Combine 400g of dark chocolate and cream in a heatproof bowl over simmering water. Stir occasionally until melted. Remove from heat. Stir in raisin mixture and 1/2 the chopped almonds. Refrigerate for about 2 hours or until firm.
  3. Take truffle mixture and from 15 bite sized balls, place on a lined baking tray. Roll each ball in remaining chopped almonds, gently pressing almonds to adhere.
  4. Roll slightly smaller sized balls and place on another lined tray. Place in freezer for 20 minutes, or until firm.
  5. Melt 300g dark chocolate, add copha and stir until smooth. Take off heat. Insert a bamboo skewer into ball and dip into chocolate to cover. Gently tap on side of bowl to remove excess. Place on tray, then repeat with remaining balls. Allow to set at room temperature.
  6. Combine melted white chocolate and oil. Drizzle over half the remaining truffles. Allow to set. Before serving, lightly dust remaining truffles with cocoa.


Rating?
4 out of 5 reindeers!

Wednesday, December 23, 2009

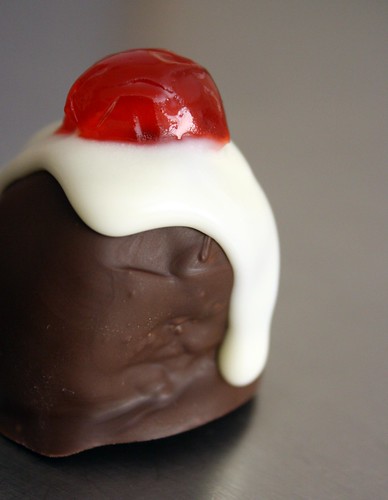
On the eleventh day of Christmas (Chocolate Puddings)

Sorry for being absent of late! if I haven't told you already Emma (my beautiful big sister) has come back to Australia for Christmas, all the way from New York. So as you can imagine there has been a lot of catch up going on - especially since Em hadn't yet met Zoe, not that you could tell that now - since Zoe and Em are now best friends - lots of hugs and kisses are going on in this household. And I love it. So things are going to be a bit quiet on the blogging front for the next month - but I will try post at least a few times a week. And of course I have to finish my '12 Baking Days of Christmas' project.

I think the eleventh day of Christmas may in fact be the most awesome day - these chocolate pudding truffles are sooo delicious, they look incredibly cute and they are super easy to make! So give these a go, they make great gifts for friends and family - as long as you don't eat them all yourself first!


Chocolate Puddings (from Recipes+ - December 2008)
Makes 12 (I made mine smaller to get 24 instead)

1 cup dried apricots
1/2 cup raisins
2 tbsp orange juice (I omitted this)
375g dark chocolate, melted
3 cups plain cake crumbs (I used light fruit cake instead and 500g of it)
80g white chocolate, melted
1/3 cup red glace cherries, chopped (I just halved mine instead)
  1. Process apricots, raisins and orange juice until finely chopped.
  2. In a large bowl combine the fruit mixture, cake crumbs and half the melted dark chocolate. Shape mixture into 24 balls.
  3. Coat each ball in the remaining dark chocolate and leave to set.
  4. Drizzle the top of each ball with white chocolate and top with glace cherry. Leave to set.

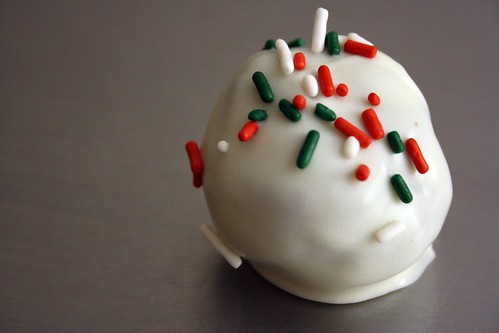
And for something different you can instead coat each ball in white chocolate and then sprinkle with Christmas sprinkles, very festive...


Rating?
5 out of 5 reindeers!

Wednesday, December 16, 2009

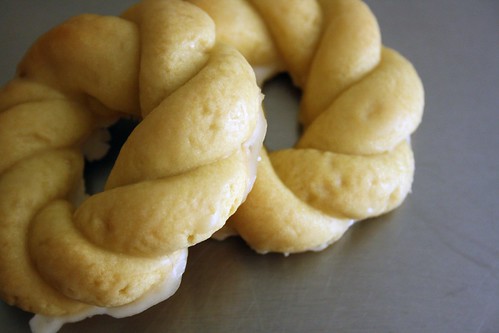
On the tenth day of Christmas (Christmas Wreaths)

Okay I did it again, I used another Better Homes and Gardens recipe, and guess what - it worked! I was so excited when this recipe just worked for me until it came to tasting the end result. Bland, bland and blander. There is absolutely nothing of interest with these cookies. They were going to be used as Christmas presents, but currently they are sitting in my rubbish bin with a whole heap of day old cat food on top of them - not so yummy.
So that is it - I am done with Better Homes and Gardens recipes! To be honest I can't believe it took me this long.

Let us hope that the next two (and final two) baking days of Christmas are more successful!


Christmas Wreaths (from Better Homes and Gardens - December 2007)
Makes 16

2 3/4 cups plain flour
3/4 cup icing sugar
125g unsalted butter, chilled, chopped
2 eggs, lightly beaten
1 tsp vanilla extract
Extra flour, for kneading
Extra 1 cup icing sugar, sifted
1 tsp vanilla extract
About 1 tbsp hot water
  1. Preheat oven to 160C. Line 2 trays with baking paper.
  2. Put the flour and icing sugar in a food processor and process for 30 seconds. Add the butter and process until mixture resembles fine breadcrumbs. Add the eggs and vanilla and process until the mixture forms into a ball.
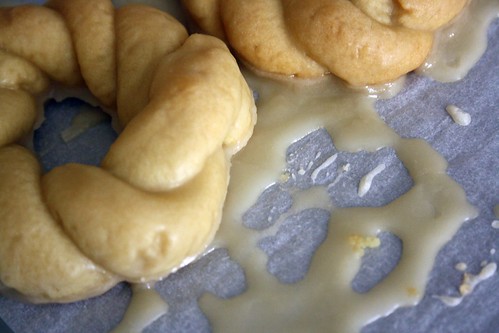
  3. Gently knead dough on a lightly floured surface until smooth. Divide dough into 16 pieces. Divide each portion in half and roll each half into a 16cm long sausage shape. Twist the 2 sausages together and form into a circle shape. Press the edges together, forming a wreath. Put the wreath onto the prepared oven tray. Repeat with remaining portions of dough.
  4. Bake wreaths for 15-20 minutes or until firm to the touch and cooked underneath. Stand tray on a wire rack until biscuits are cool.
  5. Put extra icing sugar in a mixing bowl, make a well in the centre, add the vanilla and stir in enough water until a thin mixture is formed. Put biscuits in a single layer on a wire rack over a sheet of baking paper or a tray. Spoon a little of the icing over each biscuit. Leave for 30 minutes or until the icing is firm.

Rating?
1 out of 5 reindeers!

Monday, December 14, 2009

On the ninth day of Christmas (White Christmas)

Okay my Internet connection is ridiculously slow at the moment so this blog post has been a pain in the butt to put together. Just imagine waiting for 5 minutes for each web page to load up - yes it really is that bad right now. Hopefully this will only be a small glitch and then we will have "lightning" speeds again tomorrow. Well we better.

Anyway onto the baking - it seems Better Homes and Gardens has let me down again! This time the White Christmas recipe (a classic Christmas treat in Australia) was close to a diaster. The recipe calls for 250g of Copha (vegetable shortening) however I found that it was nowhere near enough to make the slice stick together. So my White Christmas quickly became slightly yellow Christmas because I needed to add some unsalted butter (since I didn't have any extra Copha) to make it all stick together. But in the end it tastes pretty good - if you don't mind Copha. It really is a love or hate kind of ingredient. I don't mind it, but Mat thinks it is like eating wax - yummo. So if you can handle Copha then this is another treat that is great to package up and give us a gift or to eat yourself. It was last up to 3 weeks in an airtight container in the fridge.


White Christmas (from Better Homes and Gardens - December 2009)

250g Copha (vegetable shortening), chopped (I would have 2 packs on hand just in case you need more to bind it together)
3 cups puffed-rice cereal
1 cup desiccated coconut
1 cup icing sugar
1 cup powdered milk
300g rose-flavoured Turkish delight, chopped (I used red glace cherries instead)
1/2 cup toasted almond flakes
  1. Line base and sides of a lamington tin with baking paper.
  2. Put Copha in a small heavy-based pan over a low heat and melt. Remove from heat and stand until lukewarm.
  3. Combine cereal, coconut, icing sugar, powdered milk, turkish delight and almonds and stir to combine.
  4. Make a well in the centre, add Copha and stir until mixture is uniformly moist and coated in Copha. Spoon into prepared tin and pack down with the back of a spoon. Cover with cling wrap and refrigerate for 2-3 hours or until firm.
  5. Remove White Christmas from the tin and cut into bars or squares.

Rating?
3 out of 5 reindeers!

Thursday, December 10, 2009

On the eighth day of Christmas (White Rocky Road)

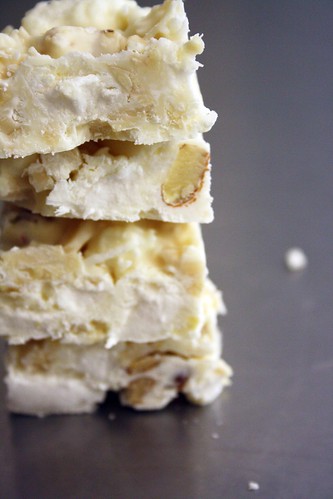
Okay so apologies in advance, there is a total lack of photos for this recipe - but it couldn't be helped! For one thing it was a very gray day so the lighting was not so good. Then Zoe didn't exactly want me to do any baking (picture tears, tantrums and a whole lot of carry on), so it was all very rushed. But hey I made it and it is delicious! Sweet white chocolate, chewy marshmallows, tasty almond nougat and crunchy almonds = awesome!

This is another treat that would be perfect to package up and give as a gift at Christmas time (or any time really). It will keep for up to 2 weeks in an air-tight container in the refrigerator.

So you know what to do, get in the kitchen and get baking :)


White Rocky Road (from Better Homes and Gardens - December 2007)
Makes about 20 pieces

2/3 cup slivered almonds
1 cup white marshmallows, roughly chopped
1/2 cup shredded coconut
150g vanilla almond nougat, roughly chopped
375g white chocolate, melted
  1. Line bottom and sides of 2 bar tins with baking paper.
  2. Combine almonds, marshmallows, coconut and nougat.
  3. Add the melted chocolate and stir to combine.
  4. Spoon mixture into prepared tins, cover with glad wrap and refrigerate for 2-3 hours or until firm.
  5. Turn out rocky road and cut each bar into pieces.

Rating?
5 out of 5 reindeers!

Monday, December 7, 2009

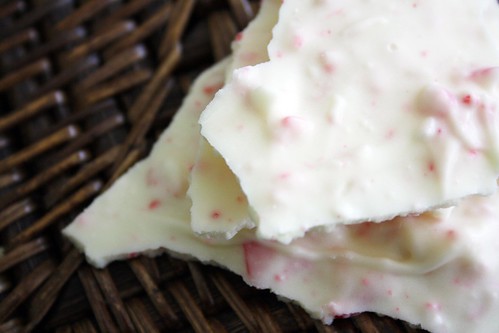
On the seventh day of Christmas (Peppermint Bark)

Can I just say that peppermint bark totally rocks my world!

How can something so simple taste so good?

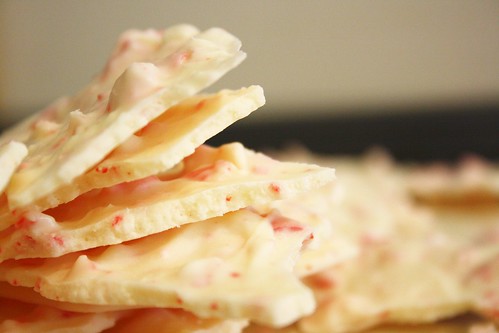
Yummy white chocolate together with crunchy peppermint candy canes makes for an awesome Christmas treat. Also peppermint bark is a great sweet to give as gifts, easy to make and easy to love. Just pop a few pieces in a little plastic bag and then tie with some pretty Christmas ribbon - voila! You can also keep the peppermint bark in an air-tight container in the refrigerator if you want to make it in advance.

So what are you waiting for get yourself into the kitchen and make some now!


Peppermint Bark

500g white chocolate, melted
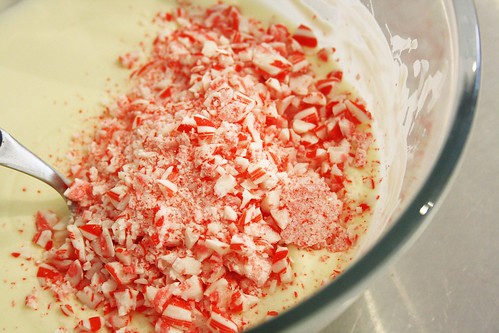
8 peppermint candy canes, crushed (just place the candy canes in a plastic bag and smack them around with a rolling pin - lots of fun!)
  1. Mix together the chocolate and candy canes.
  2. Line 2 baking trays with baking paper.
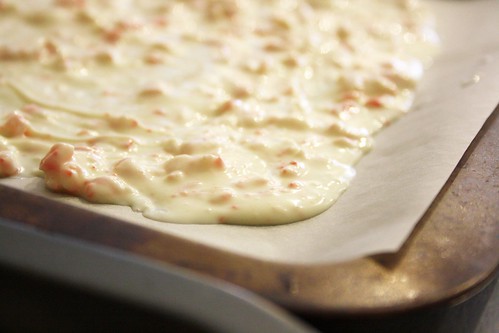
  3. Spread out the chocolate mixture on the baking trays. Allow to set.
  4. Break up the bark into whatever size pieces you want.

Yummy crushed candy canes...


Melted white chocolate...


Put the candy canes and chocolate together...


Mix it all up...


Spread it all out...


Let it set, and then break it up...


Rating?
5 out of 5 reindeers!