Showing posts with label cookies. Show all posts

Wednesday, November 27, 2013

Confetti Biscuits

Confetti Biscuits

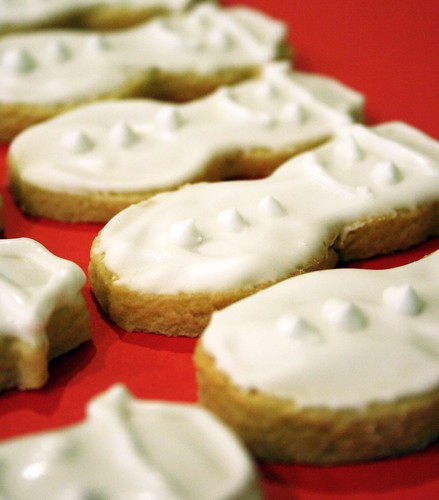
I love to bring a home made treat when I take the girls on a play date - and these Confetti biscuits are incredibly easy, cute and delicious too. Definitely give them a try if you are looking for a quick and easy biccy to make.

Confetti Biscuits
175g unsalted butter, chilled and chopped
2/3 cup caster sugar
2 cups plain flour
1 egg
2 tsp vanilla extract
180g white chocolate, melted
190g 100's and 1000's, to decorate

  1. Process the butter, sugar and flour until the mixture resembles breadcrumbs. Add egg and extract. Process until mixture comes together. 
  2. Turn dough onto a lightly floured surface. Knead gently. Divide mixture into 2 halves. Shape into 2 discs. Wrap both portions in plastic wrap and refrigerate for 30 minutes.
  3. Preheat oven to 170 C. Line 2 large baking trays with baking paper.
  4. Roll dough between 2 sheets of baking paper until 5mm thick. Then cut shapes, re-roll and cut scraps. Place the shapes 2cm apart on the trays and cook for 8 - 10 minutes, or until biscuits are golden and firm to the touch. Transfer to a wire rack to cool.
  5. Spread the tops of the biscuits with chocolate, then sprinkle with 100's and 1000's and set aside for 1 hour to cool.

Confetti Biscuits

Wednesday, February 2, 2011

20 Sweets in 20 Weeks - #9: Slice and Bake M&M Cookies

m&m cookies

I couldn't believe it when we had a draw with last week's poll - 12 votes for glazed lemon and 12 votes for M&M's. I had to make the executive decision and since I am trying to lose weight I decided that I should make the ones that Zoe was more likely to want for her morning tea, in the hopes that would stop me from eating them all. And so I decided upon M&M's - and just as a side note they are named M&M's after the initials of the owners of the recipe/company Forrest Mars Sr. and R. Bruce Murrie. So there you go.

Now on to the cookies. These were really easy to make, the dough took about 5 minutes to put together and then I just left it in the fridge overnight, sliced it up the next day, baked and voila! Done. Unfortunately though I am not a huge fan of these - I don't mind the taste so much, I mean who can say no to M&M's. But the texture of these cookies I am not a fan of. I don't really know how to describe it other than a bit chalky - if that makes any sense at all. Zoe seems to like them though - so I guess that is the most important thing. Oh, and I also discovered that a very small handful of M&M's is a good way to make a toddler very happy and busy for quite some time. So without further ado, the recipe...

Lots of m&m cookies
 
Slice and Bake M&M Cookies (from The Australian Women's Weekly - Cookies)
Makes 48

250g unsalted butter, softened
200g icing sugar
1 tsp vanilla extract
300g plain flour
75g rice flour
50g corn flour
70g mini M&M's (I used 150g of normal size M&M's instead)
2 tbsp milk
  1. Beat butter, sifted icing sugar and extract in small bowl with electric mixer until light and fluffy. Transfer to large bowl; stir in sifted flours and M&M's, in two batches, then milk.
  2. Divide mixture in half. Knead each half on floured surface until smooth, then roll each half into 25cm logs. Wrap each log in baking paper; refrigerate about 1 hour or until firm (I left mine overnight).
  3. Preheat oven to 160C. Grease oven trays; line with baking paper.
  4. Cut the logs into 1cm slices; place about 3cm apart on oven trays. Bake about 20 minutes. Cool on wire racks.
What is in there?
 Cookie dough all wrapped up.

Cookie Dough
Pretty M&M colours in the cookie dough.

Sliced Cookie Dough
Sliced cookie dough waiting to be baked.

Lots of m&m cookies
The end result - M&M cookies.

    Wednesday, January 12, 2011

    20 Sweets in 20 Weeks - #6: Apple Sauce and Blueberry Drop Cookies

    Apple Sauce and Blueberry Cookies

    In all honesty I was kind of disappointed when these cookies won the poll. You see these cookies are actually kinda, sorta, well a little bit healthy. And funnily enough even though I really, really want to lose weight the thought of healthy baked goods sometimes just doesn't appeal. So there you have it. But anyways, I made the cookies because I made a promise to my dear readers and you know what? They actually aren't that bad. They certainly aren't a devilish chocolate cookie but they are quite good for a nice healthy treat. These cookies are moist, with a cake-like texture, a hint of cinnamon flavour and some nice chewy bits thanks to the dried blueberries.

    So if you are on a bit of a health kick and want some reduced-sugar cookies that actually taste good, then why not give these a try?

    Apple Sauce and Blueberry Cookies

    Apple Sauce and Blueberry Cookies (from 500 Cookies by Philippa Vanstone)
    Makes 30

    115g unsalted butter, softened
    50g demerera sugar
    1 egg
    300g plain flour
    1 tsp baking powder
    1/2 tsp ground cinnamon
    1/2 tsp bicarbonate of soda
    pinch of salt
    50g dried blueberries (I used 70g)
    225 unsweetened apple sauce (I used 250g)
    2 tbsp water (I omitted the water)
    1. Preheat the oven to 180C.
    2. Beat the butter and sugar in a bowl until light and fluffy. Add the egg and beat well.
    3. Stir in the sifted dry ingredients, dried blueberries, apple sauce and water one at a time (I omitted the water).
    4. Drop teaspoonfuls onto a non-stick baking sheet and bake for 12-15 minutes.
    5. Store in an airtight container for 2-3 days.
    Apple Sauce and Blueberry Cookies

      Monday, June 28, 2010

      20 Sweets in 20 Weeks - #2 Chocolate Cut-Out Cookies


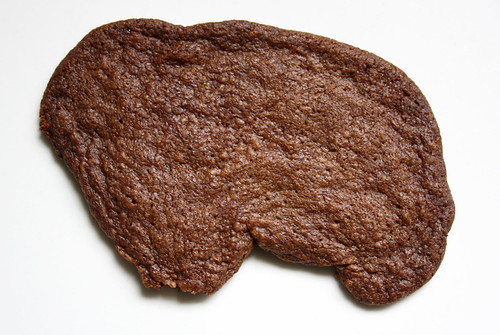
      Oh dear - as you can see this recipe did not go to plan.

      I was so sure that the freezing and refrigerating of the dough would produce perfectly shaped cookies, but sadly I was wrong. I think it has a lot to do with the oven in my new house - methinks I need to get an oven thermometer to see what is going on in there. I think it is far hotter than what the temperature dial says and therefore it totally melted the butter in these cookies before they got a chance to bake properly.

      Luckily they still tasted quite good - albeit a bit crispy. But nice and chocolately and not too sweet. Oh and in case you were wondering the cookie up the top is supposed to be a flower and the one below a cow - it looks like the cow is transforming into a bison!


      Chocolate Cookies (from Confetti Cakes for Kids by Elisa Strauss)
      Makes approximately 12 x 3 inch cookies

      11 ounces all-purpose flour
      1/4 tsp salt
      1/2 tsp baking soda
      6 ounces bittersweet chocolate, chopped
      8 ounces unsalted butter
      8 ounces granulated sugar
      1 large egg
      1 tsp vanilla extract
      1. In a medium bowl, sift together the flour, salt and baking soda. Set aside.
      2. Melt the chocolate either in a double boiler over medium heat or in the microwave in 15 second increments.
      3. In the bowl of a standing mixer with a paddle attachment, combine the butter and sugar and beat on medium speed until light and fluffy. Add the egg and vanilla and beat until combined.
      4. Set the mixer to low speed and add the melted chocolate.
      5. Add the flour mixture in 2 batches, scraping down the bowl after each addition. Beat until the dough just comes together, being careful not to overmix.
      6. Turn out the dough onto a lightly floured surface. Form the dough into a bowl, wrap it in plastic and refrigerate for 30 minutes.
      7. Place the dough between 2 pieces of parchment paper and roll out to 1/4 inch thick. Transfer the dough to the refrigerator and chill for at least 1 hour.
      8. Cut out cookies in the desired shapes and place at least 1 inch apart on a half-sheet pan lined with parchment paper or an ungreased nonstick cookies sheet. Transfer to the refrigerator and chill for at least 15 minutes or until they are stiff.
      9. Preheat the oven to 350 F.
      10. Bake until the cookies are firm to the touch, about 10 minutes.
      11. Let the cookies cool completely before decorating.
      And what did Zoe think of these cookies you may ask...


      She definitely approves :)

      Wednesday, December 16, 2009

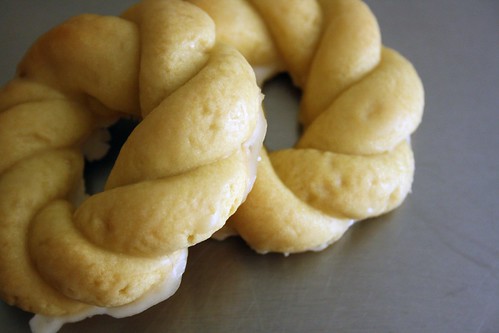
      On the tenth day of Christmas (Christmas Wreaths)

      Okay I did it again, I used another Better Homes and Gardens recipe, and guess what - it worked! I was so excited when this recipe just worked for me until it came to tasting the end result. Bland, bland and blander. There is absolutely nothing of interest with these cookies. They were going to be used as Christmas presents, but currently they are sitting in my rubbish bin with a whole heap of day old cat food on top of them - not so yummy.

      So that is it - I am done with Better Homes and Gardens recipes! To be honest I can't believe it took me this long.

      Let us hope that the next two (and final two) baking days of Christmas are more successful!


      Christmas Wreaths (from Better Homes and Gardens - December 2007)
      Makes 16

      2 3/4 cups plain flour
      3/4 cup icing sugar
      125g unsalted butter, chilled, chopped
      2 eggs, lightly beaten
      1 tsp vanilla extract
      Extra flour, for kneading
      Extra 1 cup icing sugar, sifted
      1 tsp vanilla extract
      About 1 tbsp hot water
      1. Preheat oven to 160C. Line 2 trays with baking paper.
      2. Put the flour and icing sugar in a food processor and process for 30 seconds. Add the butter and process until mixture resembles fine breadcrumbs. Add the eggs and vanilla and process until the mixture forms into a ball.
      3. Gently knead dough on a lightly floured surface until smooth. Divide dough into 16 pieces. Divide each portion in half and roll each half into a 16cm long sausage shape. Twist the 2 sausages together and form into a circle shape. Press the edges together, forming a wreath. Put the wreath onto the prepared oven tray. Repeat with remaining portions of dough.
      4. Bake wreaths for 15-20 minutes or until firm to the touch and cooked underneath. Stand tray on a wire rack until biscuits are cool.
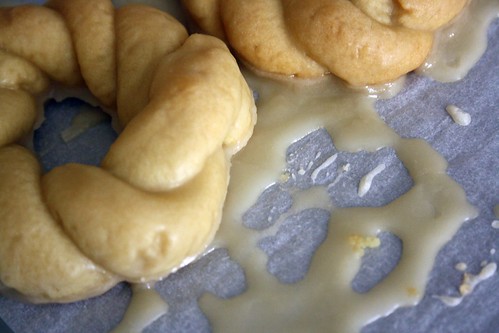
      5. Put extra icing sugar in a mixing bowl, make a well in the centre, add the vanilla and stir in enough water until a thin mixture is formed. Put biscuits in a single layer on a wire rack over a sheet of baking paper or a tray. Spoon a little of the icing over each biscuit. Leave for 30 minutes or until the icing is firm.

      Rating?
      1 out of 5 reindeers!

      Wednesday, November 25, 2009

      On the third day of Christmas (Iced Lemon Cookies)

      There is only 29 days left until Christmas! Can you believe it? So what are your plans this year?

      I plan to put up the Christmas tree and decorations on the 1st of December. I am also making some Christmas stockings for everyone in the family - even the cats. We will be having Christmas lunch with my mother and sister at our place, with simple food and of course dessert. The gifts this year are going to be simple - homemade gifts baked with love, some new toys for the little one and some other small bits and bobs.

      Enough about that. Lets talk about these Iced Lemon Cookies. I had trouble with these cookies - again the dough would not come together so I had to slightly alter the recipe. Then came the royal icing piping. Well you'll see how that turned out. And finally the cookies were just a bit bleh - not very lemony and not that sweet. So not my favourite, I probably won't make them again.


      Iced Lemon Cookies (from Better Homes and Gardens - December 2007)
      Makes 30 small cookies (or 16 large cookies)

      2 cups plain flour
      1/2 cup almond meal
      1/2 cup caster sugar
      pinch of salt
      125g butter, chilled, chopped
      1 egg, lightly beaten
      1 tsp lemon essence
      extra flour, for kneading
      1. Put flour, almond meal, sugar and salt in a food processor and process for 30 seconds. Add butter and process until mixture resembles fine breadcrumbs. Add egg and lemon essence and process until mixture forms into a ball (I needed to add another half an egg before my dough would come together).
      2. Knead dough on a lightly floured surface until smooth. Pat dough into a disc, put into a plastic bag and refrigerate for 1 hour.
      3. Preheat oven to 160C. Line 2 oven trays with baking paper. Roll out dough between 2 sheets of baking paper until 5mm thick. Use a Christmas cutter to cut out shapes. Put shapes on oven trays. Bake for 12 minutes or until cooked through. Leave on trays for 5 minutes and then transfer to a wire rack to cool.
      4. Ice with royal icing (recipe below).

      Royal Icing (if you don't trust raw egg whites you could use this recipe instead)

      2 egg whites
      4 cups icing sugar, sifted
      1 tsp lemon juice
      1. Beat egg whites until frothy.
      2. Add icing sugar a little at a time until you have stiff peaks.
      3. Beat in the lemon juice.

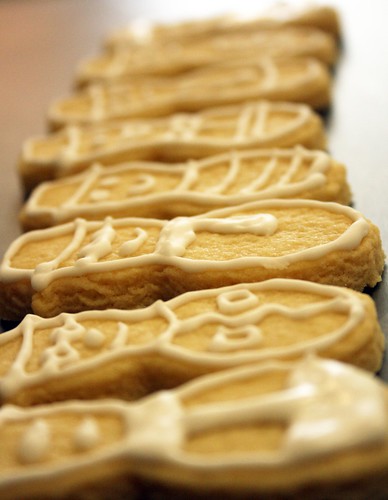
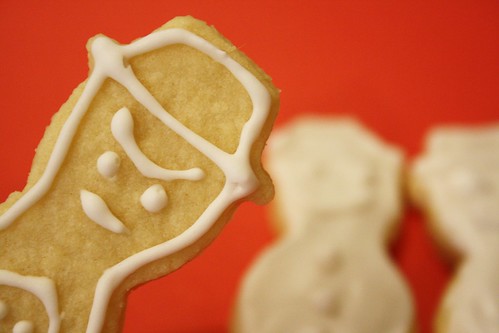
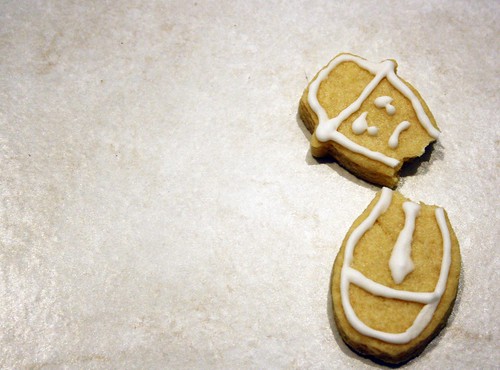
      When I started to ice this cookies I quickly discovered that I have ZERO piping skills. And I mean zero. Look at my sorry excuse for piping...


      It kind of made me angry....


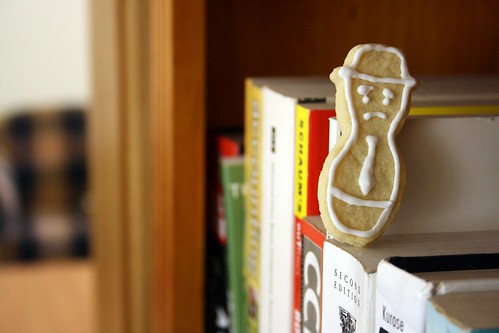
      And this little man was very sad about the way he was piped...


      I tried to talk him out of it....


      But it was too late...


      Luckily the 10 second rule applies in this house and we got to eat him.


      Oh well - practice makes perfect. I'll just have to make more cookies!

      Rating?
      2 out of 5 reindeers!

      Monday, November 16, 2009

      On the first day of Christmas (Jam Cookies)

      A few of you asked what my next project was going to be now that my A.. B.. Cupcakes project is finally finished. Well, since it is nearly Christmas I thought why not bake some sweet Christmas treats? So my friends I present to you the...
      Between now and Christmas I will post 12 Christmas recipes - including truffles, cookies, cakes and candy. It is going to be fun, and I hope you stick around for the ride!


      On the first day of Christmas my true love sent to me Jam Cookies!

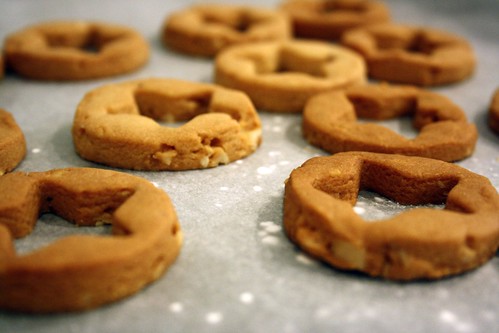
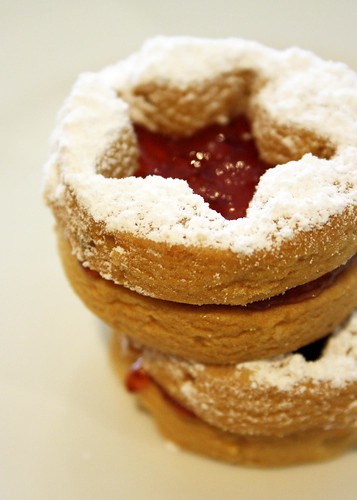
      I thought I would start off the project with a relatively simple cookie and this Jam cookie sounded just right. Once I started making it however I ran into a few problems. First of all the dough was supposed to come together so that it could be kneaded. My dough looked like a big bunch of crumbs, so I had to alter the recipe a bit.


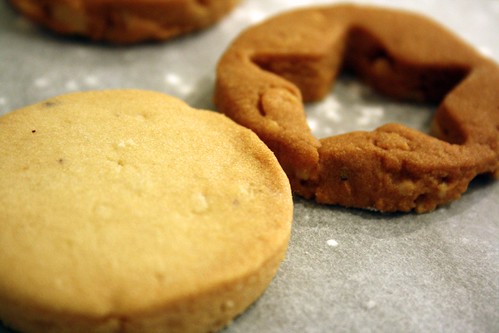
      Then my next issue was that they were supposed to bake in 8-10 minutes, after 20 minutes I decided that the temperature must of been too low so I pumped it up and then burnt them. See the bottom of the cookies weren't too bad...


      But the tops were a bit dark...


      Then when you see the bottom and the top next to each other you can really notice the difference, whoops!


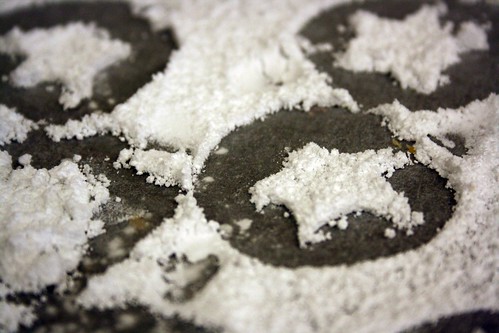
      Luckily you dust these babies with a whole heap of icing sugar so no one needs to know just how much you over-baked them...


      And also the icing sugar leaves a cool pattern on your bench top...


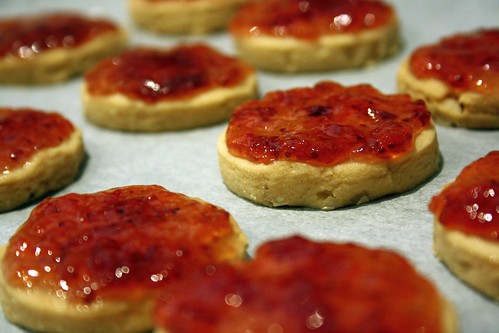
      And everyone is more forgiving when you pile on the jam...


      Even after all the issues with these cookies they were still pretty good, just like a hazelnut shortbread with jam and icing sugar to make it nice and super sweet (just the way I like it).


      Jam Cookies (from Better Homes and Gardens - December 2008)
      Makes about 12 biscuits

      125g unsalted butter, softened
      1/2 cup icing sugar, sifted
      1 tsp vanilla extract
      1 1/3 cups plain flour
      1/4 cup rice flour
      1/3 cup hazelnuts, toasted, finely chopped
      1 egg
      extra flour, for kneading
      1 cup plum jam (I used strawberry jam)
      icing sugar for dusting
      1. Preheat oven to 160C (I would try 170C if I made these again). Line 2 oven trays with baking paper.
      2. Beat butter, sugar and vanilla extract until light and creamy.
      3. Add flours and hazelnuts and mix until well combined (at this stage I added in a beaten egg - because my dough wouldn't come together).
      4. Turn onto a lightly floured surface and knead gently.
      5. Roll out dough on a lightly floured surface until 6mm thick. Using a 4cm fluted cutter (I just used a circle cutter), cut out rounds. Using a smaller fluted cutter (I used a small star cutter), cut out the centres from half the cookies. (Re-roll the centres into extra cookies if desired.)
      6. Put whole cookies on 1 prepared tray and cut-out cookies on the other. Bake for 8-10 minutes or until pale golden (I would try at 170C for 10 minutes if I made these again).
      7. When cooled sprinkle icing sugar over the cut-out cookies and jam over the whole cookies, then sandwich the two pieces together.
      8. Best enjoyed on the day of baking or the next day.

      Rating
      3 out of 5 reindeers!

      Monday, November 9, 2009

      Oatmeal and Raisin Cookies

      I watched an episode of Oprah the other day. I know what you are all thinking - a stay at home mum watching Oprah tsk, tsk. However you have to trust me when I say this, it is not a normal occurrence in this household. Usually Zoe and I will listen to an awesome playlist that Mat created for me on our media center. The playlist includes all my crooners, my necessary dose of Michael Jackson, some alternative-country by Mr Ryan Adams, The Royal Crown Revue and lots of easy listening music.

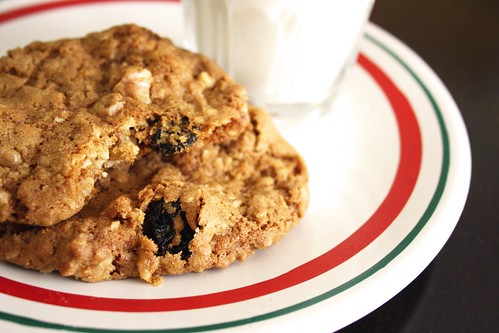
      But anyway, I was talking about Oprah. This episode was all about extreme life lengthening. They had this one man on the show who was in his 50s and was on a calorie controlled diet - 1950 calories each and every day, and most of those calories come from raw food. Some professionals believe that he could very well be the first man to live to 150. The first thing that came to my mind was "how could you possibly live for 150 years and not enjoy delicious food?". No cupcakes, no cookies, no cake, no crossaints, no buttery french toast, no bacon and eggs for breakfast, no ice-cream - I think I would rather be dead. So I say no to a calorie controlled diet and instead I will enjoy my oatmeal and raisin cookies with a nice glass of full-cream milk. I hope that you will do the same.


      Oatmeal and Raisin Cookies (from Bringing Home the Baking by Quincella C. Geiger)
      Makes approx 5 dozen cookies

      1 cup unsalted butter, softened
      3/4 cup caster sugar
      1 1/4 cups brown sugar
      2 eggs
      1 tsp vanilla extract
      2 cups plain flour
      1 1/2 tsp bi-carb soda
      1/2 tsp salt
      1 1/2 tsp cinnamon
      1/2 tsp nutmeg
      1 1/2 cups quick-cooking oats
      1 cup raisins
      1 1/2 cups chopped pecans or walnuts (I used walnuts)
      1. Preheat oven to 180C.
      2. Beat butter at medium speed until cream. Gradually add sugars, beating well. Add eggs and vanilla; beat well.
      3. Combine flour and next 4 ingredients; gradually add to butter mixture; mix until well blended. Stir in oats, raisins, and nuts.
      4. Measure dough evenly (I used an ice-cream scoop) and place on baking trays lined with baking paper. Bake 8 to 10 minutes or until lightly browned. Cool completely.

      Thursday, November 5, 2009

      Chocolate Freckle Cookies

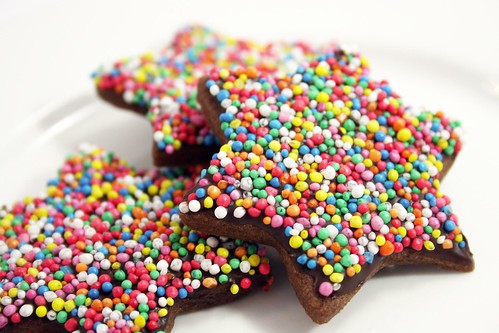
      Zoe and I have been sick for the last few days and it has not been fun. I am over wiping her nose, blowing my nose, taking panadol, sniffing, sneezing and not getting much sleep. I am definitely looking forward to feeling 100% - oh to be able to breathe and smell again.

      So you might be asking what does one bake when feeling under the weather? Why Chocolate Freckle Cookies of course. These bright and pretty cookies should be enough to make anyone feel just that little bit better.


      Chocolate Freckle Cookies (from The Australian Women's Weekly - Cookies)
      Makes 42

      125g unsalted butter, softened
      165g brown sugar
      1 egg
      225g plain flour
      35g self-raising flour
      35g cocoa powder
      200g dark chocolate, melted
      85g hundreds and thousands
      1. Beat butter, sugar and egg until combined. Stir in sifted dry ingredients in two batches.
      2. Knead dough on floured surface until smooth; roll dough between sheets of baking paper until 5mm thick. Cover and refrigerate for 30 minutes.
      3. Preheat oven to 180C and line baking trays with baking paper.
      4. Using 3cm and 5cm round cutters (I used star cutters) cut rounds from the dough. Place 3cm rounds on one tray and 5cm rounds on another.
      5. Bake small cookies for 10 minutes and larger cookies for 12 minutes. Cool on wire racks.
      6. Spread tops of cookies with chocolate (I ended up dipping my cookies and then tidying up the edges, it was a lot quicker), sprinkle with hundreds and thousands. Set at room temperature.

      Friday, October 30, 2009

      Cornflake Cookies


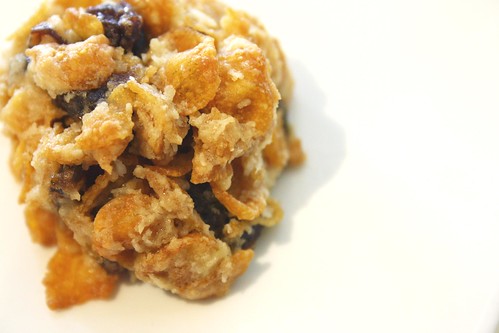
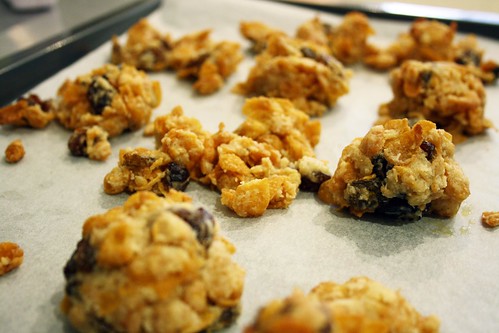
      Have you had a really good cornflake cookie before? You know the ones - the right amount of crunch from the cornflakes, the right amount of chew from the cookie dough and the right amount of sweetness from the sultanas. Well this recipe did not produce those cookies. Dang it. There were way too many cornflakes so the cookies were almost impossible to put together. In fact a lot of them fell apart after been baked.


      Total disaster.

      Have you got a tried and true recipe for cornflake cookies? I would love to steal it if you do, so please let me know.

      For now here is my dodgy recipe...

      Cornflake Sultana Cookies (from The Australian Women's Weekly Basic Cookbook)
      Makes about 25

      5 cups cornflakes
      1 cup coconut (desiccated)
      1/2 cup brown sugar
      1 cup sultanas (I used raisins)
      1 cup self-raising flour
      185g butter, melted
      2 eggs, lightly beaten
      1. Combine cornflakes, coconut, sugar, sultanas and sifted flour in large bowl.
      2. Stir in butter and eggs gently with a wooden spoon.
      3. Shape rounded tablespoons of mixture into balls (yeah right, that was nearly impossible).
      4. Place balls about 5cm apart on greased oven trays.
      5. Bake at 180C for about 10 minutes, or until lightly browned.
      6. Stand cookies for 3 minutes before cooling on a wire rack.

      Monday, October 12, 2009

      X is for Xiaodianxin (or Cookie Dough Cupcakes!)


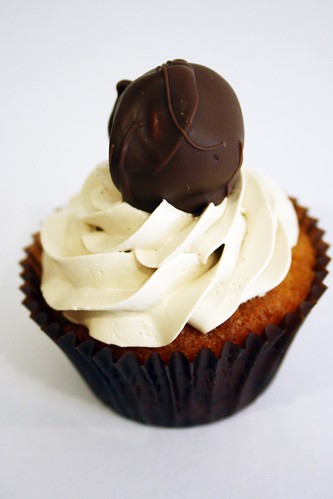
      Choc chip cupcake topped with brown sugar Swiss meringue butter cream and a cookie dough truffle

      So cookies won the poll last week. Personally I was going for banana because I wanted to make some yummy banana split sundae themed cupcakes - but hey whatever you guys want, I'll make it. Since I already made Oreo cupcakes as part of the A... B... Cupcake project I didn't want to make another cookies and cream themed cupcake - so what to make? In steps one of my favourite food blogs - Culinary Concoctions by Peabody - if you like baking and you like blogging then you must visit this wonderful blog. I remembered a post a while ago about Cookie Dough truffles and thought that would be the perfect theme for my cupcakes this week.

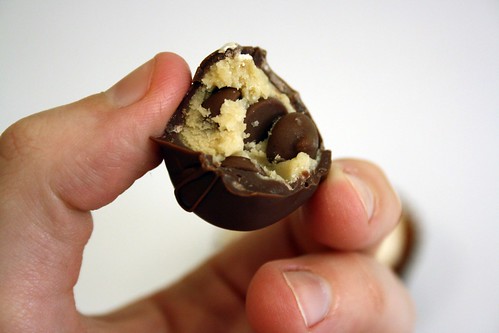
      Everyone likes sneaking a bite of the cookie dough before you bake the cookies. It is like an unwritten law in baking. These cookie dough truffles just take it to the next level - the dough is made for eating, NOT baking! They are egg free for all of those who are scared of eating raw egg - so there is no need to be afraid.

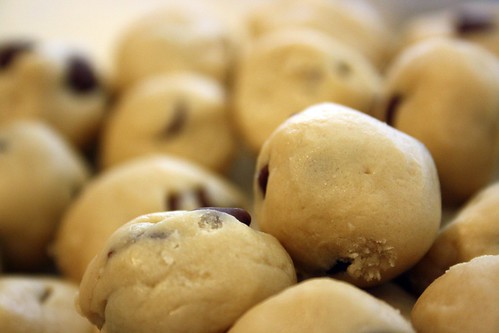
      So before we start on the cupcakes, make up these yummy cookie dough truffles first....


      Cookie Dough Truffles (from Culinary Concoctions by Peabody)

      1/2 cup unsalted butter, softened
      ¾ cup packed brown sugar
      1 tsp vanilla extract
      ½ tsp salt (I left out the salt - bring on the sugar rush!)
      2 cups plain flour
      14 ounces sweetened condensed milk
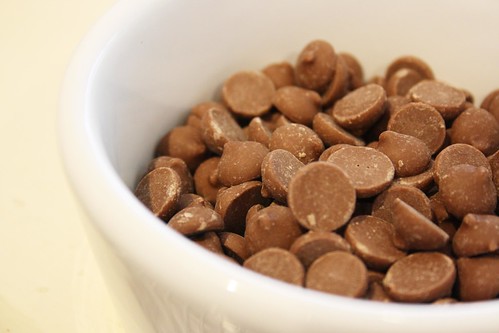
      ½ cup chocolate chips (I upped this to 1 cup - mmm chocolate)

      1. Using a stand mixer (or a bowl and beaters), cream together the butter and sugar until light and fluffy, about 3 minutes.
      2. Beat in the vanilla.
      3. With speed on low, slowly add flour, alternating with condensed milk, beating well after each addition.
      4. Fold in the chocolate chips.
      5. Shape into 1-inch balls and place into an air tight container. Store in freezer for at least 3 hours (I stored mine overnight).

      Next we need to make the cupcakes...

      Choc Chip Cupcakes (from Cupcake Heaven by Susannah Blake)
      Makes 12

      115g unsalted butter, softened
      115g caster sugar
      2 eggs
      115g self-raising flour
      1 tsp vanilla extract
      100g chocolate chips
      1. Preheat the oven to 180C and line a 12-hole muffin tray with cupcake cases.
      2. Beat the butter and sugar together until pale and fluffy.
      3. Beat in the eggs one at a time.
      4. Sift in the flour and fold in, then stir in the vanilla extract (I added the vanilla extract in with the eggs).
      5. Sprinkle over the chocolate chips and fold in.
      6. Spoon mixture into cupcake cases and bake for 17 minutes or until a skewer comes out clean.
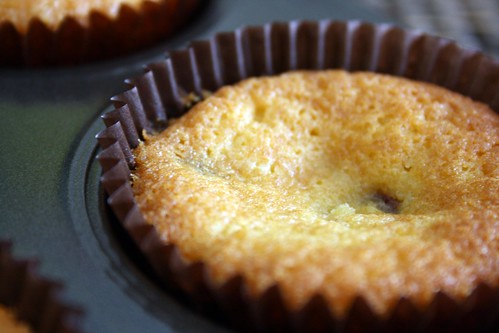
      Now I wasn't able to preheat my oven because little miss Z was running (okay crawling) around in the kitchen and I didn't want her to burn herself. So my cupcakes were in the oven for longer and I had to open the door a few times to check if they were ready, this resulted in sunken cupcakes....


      But we all know that such mishaps can be covered easily with a good dollop of frosting. So now that the cupcakes are cooling it is time to make a batch of Brown Sugar Swiss Meringue Butter Cream.

      Now frost those babies...


      Next I got a bit tricky with my cookie dough truffles and I coated them in milk chocolate (drool) - to do this I simply nuked 395g of milk chocolate in the microwave, dipped each truffle in the chocolate, then placed them on a baking tray lined with baking paper. Then pop those babies into the fridge until set. Yum!

      Once they are set top each of the cupcakes with a cookie dough truffle...


      Except this truffle - it was special you see, it had a little 'M' on it. I was going to give it to Mat but then I ate it. You know, to make sure it wasn't poisonous.


      Now enjoy your cupcake in 3 simple steps...

      1. Pick off the truffle and lick the frosting off of the bottom of it...


      2. Eat said truffle...


      3. Enjoy the choc chip goodness..


      The Ratings?

      Me - 8/10, love the SMBC, the truffles were yummy - I just wished the cupcakes didn't sink.
      Mat - 4/10, he didn't like the cookie dough truffle and the cake was too sweet - hard to please!
      Oh and don't forget to enter the Sprout Head giveaway!