Showing posts with label cake. Show all posts

Saturday, January 22, 2011

Lamingtons

Lamingtons

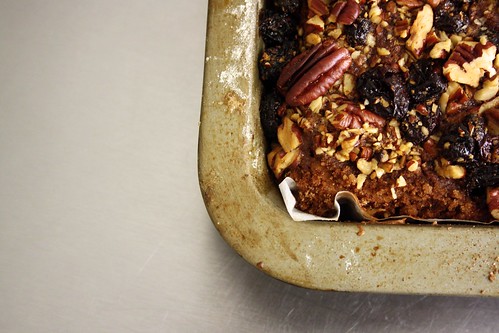
If you are a fellow Aussie you know all about lamingtons and how awesome they can be - but if you live else where you may not have experienced these little wonderful cakes. Just imagine mini sponge or butter cakes dipped in chocolate and coated in coconut - seriously one of the best flavour combinations of all time.

Lamington


Lamingtons (from the Australian Women's Weekly - 100 Favourite Cakes)
Makes 24

Cake:
4 oz unsalted butter, softened
1 tsp vanilla extract
3/4 cup castor sugar
2 eggs
2 cups self-raising flour
pinch salt
1/2 cup milk

Chocolate Icing and Coconut Topping:
1 lb icing sugar
1/3 cup cocoa
1/2 oz unsalted butter
1/2 cup milk
3/4 lb shredded coconut

Cake:
  1. Grease and line a lamington tin (11 in x 7 in). Preheat the oven to 180 C (350 F).
  2. Beat butter and vanilla together until white, add sugar, beat until light and creamy. Add eggs one at a time, beating well after each addition.
  3. Fold in sifted dry ingredients alternately with the milk. When all the ingredients are added, beat mixture lightly until smooth.
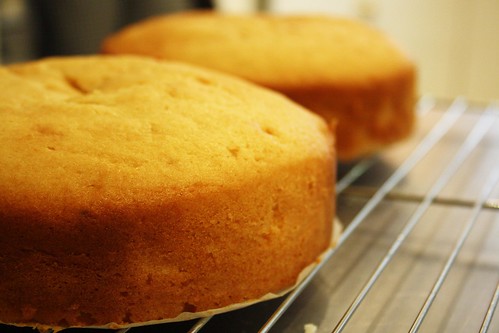
  4. Spoon mixture into lamington tin, bake in oven for 30 minutes. Cake is done when firm to the touch and a skewer inserted comes out clean. Cool slightly before turning the cake out on to a wire rack to cool completely.
Icing:
  1. Sift icing sugar and cocoa into heatproof basin, or into top half of double saucepan. 
  2. Add softened butter and milk, stir with a wooden spoon to mix thoroughly.
  3. Stand over hot water, stir constantly until icing is of good coating consistency.
  4. Keep icing over hot water while dipping lamingtons. If icing becomes too thick, add a little extra warmed milk or water. 
Putting it all together:
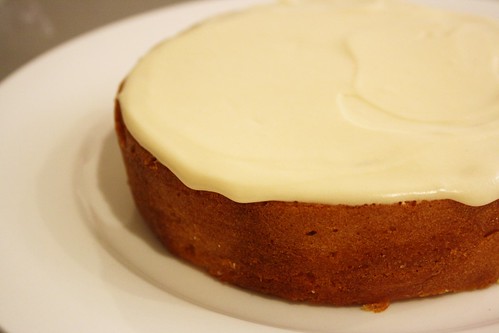
  1.  Thinly trim brown top, base and sides from cake. 
  2. Cut cake into 24 even pieces.
  3. Hold each piece of cake on a fork. Dip each cake in chocolate icing, then toss in coconut.
  4. Stand on wire rack until icing sets.
Butter Cake batter

The butter cake batter ready to bake.
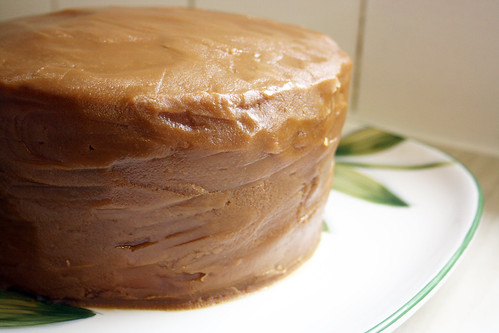
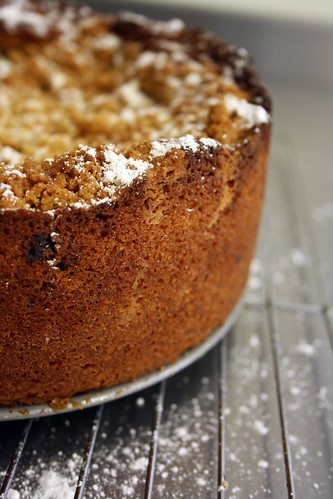
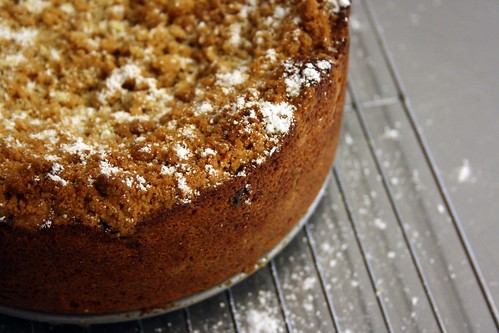
Butter Cake

The baked cake.

Cubes of cake

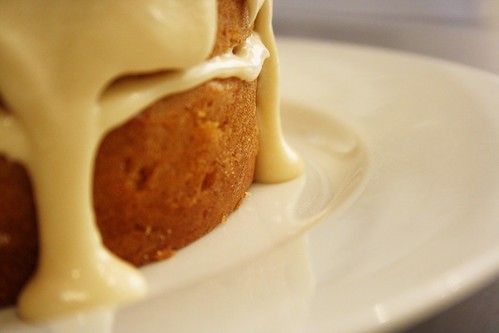
Individual pieces of cake.

Lamington

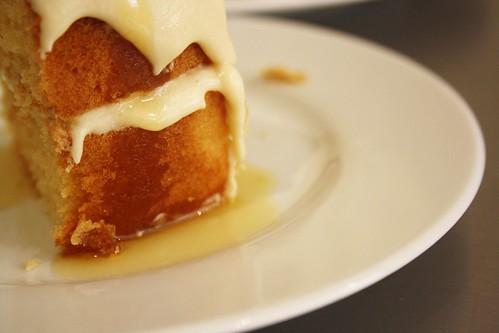
Delicious lamington!


Why not give it a try? I promise you will love this one!

Friday, July 2, 2010

20 Sweets in 20 Weeks - #3 Caramel Layer Cake


Are you ready for an absolute sugar overload? If you answered yes then read on this recipe is full of sugar and is so sweet! Even I the world's biggest sugar lover thought it was just a wee bit too sweet - but hey it hasn't stopped me from eating it. What is especially wonderful about this recipe is the cake itself - a lovely light texture, not too crumbly and super easy to make - I love it, and I hope you do too.


Yellow Cake (from Southern Cakes by Nancie McDermott)
Serves 8 to 10

3/4 cup butter
1 cup milk
2 cups sifted all-purpose flour
2 3/4 tsp baking powder
1/2 tsp salt
4 eggs
2 cups sugar
1 tsp vanilla extract
  1. Preheat the oven to 325F. Grease and flour 2 9" round cake tins. (I used 2 8" tins)
  2. Combine the butter and milk in a small saucepan, and cook over low heat until the butter melts. Stir well and set aside to cool to room temperature.
  3. Combine the flour, baking powder and salt in a medium bowl, and stir with a fork to mix well.
  4. In a large bowl, combine the eggs and sugar, and beat well at high speed, scraping down the bowl often, until light yellow, smooth, and thick.
  5. Stir the flour mixture into the egg mixture, mixing only until the flour disappears. Add the cooled milk mixture and the vanilla, and divide the batter between the prepared pans.
  6. Bake for 25-30 minutes, until the cakes are a pale golden brown, spring back when touched lightly in the center, and begin to pull away from the sides of the pans. (Mine baked for 45 minutes)
  7. Cool in the pans for 10 minutes on wire racks. Then turn out the cakes onto wire racks to cool completely, top side up.
  8. I halved each cake again to make 4 layers of cake and 3 layers of icing.

Caramel Icing (I ended up making 1.5 times the mixture to get enough for the extra 2 layers of icing)

2 2/3 cups brown sugar
1/2 cup butter
7 tbsp evaporated milk
1 tsp vanilla extract
  1. In a heavy medium saucepan, combine all of the ingredients. Bring to a boil over medium-high heat. Stir well and then adjust the heat so that the frosting boils and bubbles gently. Cook for 7 minutes. Remove from the heat and let cool for 5 minutes.
  2. Beat the warm icing with a wooden spoon until it thickens, 2-3 minutes.
  3. Quickly spread the icing over the bottom layer of cake, then position the next layer and ice again, continue until all layers of the cake are in position. Then ice the top and side of the cake.
  4. If the icing becomes too hard to spread warm gently over low heat, add a spoonful of evaporated milk, and then scrape and stir well until the icing softens enough to spread again. Dip a table knife in very hot water to help soften and smooth out the icing once it is spread.

Wednesday, December 23, 2009

On the eleventh day of Christmas (Chocolate Puddings)

Sorry for being absent of late! if I haven't told you already Emma (my beautiful big sister) has come back to Australia for Christmas, all the way from New York. So as you can imagine there has been a lot of catch up going on - especially since Em hadn't yet met Zoe, not that you could tell that now - since Zoe and Em are now best friends - lots of hugs and kisses are going on in this household. And I love it. So things are going to be a bit quiet on the blogging front for the next month - but I will try post at least a few times a week. And of course I have to finish my '12 Baking Days of Christmas' project.

I think the eleventh day of Christmas may in fact be the most awesome day - these chocolate pudding truffles are sooo delicious, they look incredibly cute and they are super easy to make! So give these a go, they make great gifts for friends and family - as long as you don't eat them all yourself first!


Chocolate Puddings (from Recipes+ - December 2008)
Makes 12 (I made mine smaller to get 24 instead)

1 cup dried apricots
1/2 cup raisins
2 tbsp orange juice (I omitted this)
375g dark chocolate, melted
3 cups plain cake crumbs (I used light fruit cake instead and 500g of it)
80g white chocolate, melted
1/3 cup red glace cherries, chopped (I just halved mine instead)
  1. Process apricots, raisins and orange juice until finely chopped.
  2. In a large bowl combine the fruit mixture, cake crumbs and half the melted dark chocolate. Shape mixture into 24 balls.
  3. Coat each ball in the remaining dark chocolate and leave to set.
  4. Drizzle the top of each ball with white chocolate and top with glace cherry. Leave to set.

And for something different you can instead coat each ball in white chocolate and then sprinkle with Christmas sprinkles, very festive...


Rating?
5 out of 5 reindeers!

Monday, November 30, 2009

On the fifth day of Christmas (Fruit Mince Crumble Cake)

Okay is it just me or do I seem to be having a fair bit of difficulties with the 12 Baking Days of Christmas project? All of the cookie dough I have made so far has been really difficult to get together, my royal icing piping skills leave a lot to be desired and now this Fruit Mince Crumble Cake. Oh dear this was the biggest disaster so far. Let me just say that I have learned a very valuable lesson. When a recipe calls for a 23cm cake tin and you think your 20cm cake tin will suffice, you are wrong and you should just stop being so stingy and go buy a 23cm cake tin. That way you won't be so disappointed when you slice into your cake to discover the bottom of it isn't cooked at all and is instead just a sludgy mess. You also wouldn't throw a tantrum and throw the rest of the cake in the bin. Yes, it was not my finest moment. All of that aside though - the edges of the cake that were cooked tasted really good and I would be willing to try this recipe again with the correct cake tin. I think the cake would be especially tasty if served slightly warmed with some lovely home made custard. So don't let my mistakes deter you - I think this recipe could be a winner!


Fruit Mince Crumble Cake (from Better Homes and Gardens - December 2008)
Makes one 23cm cake

melted butter, for greasing
icing sugar, for dusting

Crumble
1 cup self-raising flour
1/2 cup brown sugar
1/2 tsp ground cinnamon
1/4 tsp ground nutmeg
125g unsalted butter, chilled and cut into cubes

Cake
1 1/2 cups self-raising flour
1 tsp baking powder
1 cup brown sugar
160g unsalted butter, chilled and cut into cubes
2 eggs
1/3 cup milk
400g jar fruit mince (I used my home made fruit mince of course)
100g craisins (dried cranberries) (I omitted these)
  1. Preheat oven to 180C. Brush a 23cm round springform cake tin with melted butter and line base and sides with baking paper.
  2. To make crumble, combine flour, sugar, cinnamon and nutmeg into a bowl. Using your fingertips, rub butter into flour mixture until mixture resembles fine breadcrumbs. Set aside.
  3. To make cake, combine flour, baking powder and sugar in a large bowl. Rub butter into flour mixture until mixture resembles fine breadcrumbs. Make a well in the centre, add egg and milk and stir until combined. Spoon mixture into prepared tin and press evenly on base.
  4. Spread fruit mince over cake base, and sprinkle craisins over mince. Top with crumble mix.
  5. Bake for 50-60 minutes or until a skewer comes out clean when inserted into centre of cake. Stand tin on a wire rack for 15 minutes. Remove cake from tin and stand on wire rack until cold. Dust with icing sugar just before serving.

Lovely looking cake cooling on the wire rack...


Dust it with a bit of icing sugar...


Then slice it open to discover it isn't baked properly :( ...


See mushy insides...


Oh well at least the edges were edible...


Rating?
3 out of 5 reindeers! Would of been higher if I baked it properly!

Friday, November 20, 2009

Cake Slice - Burnt Sugar Cake


This is my second month as a member of The Cake Slice Bakers and this month it was all about sugar. Since I have a major (and I mean major) sweet tooth I was quite excited when I found out that the cake for this month was a lovely sounding Burnt Sugar Cake from Southern Cakes by Nancie McDermott. However when I discovered that we had to melt sugar to make the burnt sugar syrup I have to admit that I was a little scared. The last time I made toffee the pot had to be thrown away after - I made a mess of the whole thing. Well luckily this time my pot (well frying pan) came out of this baking session alive and more importantly the cake was fantastic. The burnt sugar syrup has an amazing rich toffee flavour, the cake was lovely and moist and the icing although a little grainy from the icing sugar was good too. If I make this cake again I will replace the icing with swiss meringue buttercream and then I think the cake would be perfect. So if you do want to bake this cake I would suggest making up a batch of vanilla swiss meringue buttercream and then adding the burnt sugar syrup to taste - that would be delicious!

Oh and if you are wondering, my icing was melting since it was 44 C (111 F) here when I baked the cake - so I decided to go with the flow and just let the icing dribble down the side of the cake. Well that is my excuse and I'm sticking with it!


Burnt Sugar Syrup


1 cup sugar
1 cup boiling water
  1. Heat the sugar in a cast iron skillet or another heavy bottomed pan with high sides. Heat over a medium-low heat, stirring occasionally, until the sugar melts into a clear brown caramel syrup. It should be the colour of tea.
  2. Gradually add the boiling water, pouring it down the sides of the pan so that if the syrup foams and bubbles up, you should be protected.
  3. Continue cooking, stirring often, until the water combines with the syrup and turns a handsome brown syrup.
  4. Remove from the heat and set aside to cool. Store the cooled syrup in a sealed jar if not using right away (I stored mine for 3 days).


Burnt Sugar Cake (from Southern Cakes by Nancie McDermott)


3 cups all purpose flour
1 tbsp baking powder
½ tsp salt
1 tsp vanilla extract
1 cup milk
1 cup (2 sticks) butter
1¾ cups sugar
4 eggs
½ cup Burnt Sugar Syrup (recipe above)
  1. Heat the oven to 350 degrees F. Grease and flour two 9 inch round cake pans (I baked mine in 2 6 inch round cake pans and a 12-hole muffin tray lined with cases).
  2. In a medium bowl, combine the flour, baking powder and salt and stir with a fork to mix well. Stir the vanilla into the milk.
  3. In a large bowl, beat the butter and the sugar with an electric mixer at high speed for 2 – 3 minutes, until they are well combined. Stop now and then to scrape the bowl down. Add the eggs, one by one, beating well each time. Pour in half a cup of the burnt sugar syrup and beat well.
  4. Add a third of the flour mixture and about half of the milk, beating at a low speed, until just incorporated. Mix in another third of the flour and the rest of the milk. Finally, add the remaining flour.
  5. Divide the batter between the cake pans and bake at 350F for 20 to 25 minutes until the cakes are golden brown, spring back when touched gently in the centre and begin to pull away from the sides of the pan (for some reason it took 40 minutes in my oven - maybe because I couldn't preheat - due to little miss Zoe crawling around).
  6. Let the cakes cool in the pans on a wire rack for 15 minutes. Turn out the cakes onto a wire rack to cool completely.

Burnt Sugar Frosting


3¾ cups confectioners sugar
½ cup Burnt Sugar Syrup (above)
¼ cup (½ stick) butter
½ tsp vanilla extract
2 – 3 tbsp evaporated milk or normal milk (I used normal milk)
  1. In a large bowl, combine the confectioners sugar, the burnt sugar syrup, butter and vanilla. Beat with a mixer at medium speed for 2 to 3 minutes, scraping down the bowl now and then to bring the ingredients together.
  2. Add 2 tablespoons of the milk and continue beating until the frosting is thick, soft, smooth and easy to spread. Add a little more sugar if it is thin, and a little more milk if it is too thick.

To Assemble

Place one layer, top side down, on a cake stand or serving plate.


Scoop about ¾ cup of the frosting onto the cake and spread to the edges.


Place the second cake layer over it, top side down (I put mine bottom side down for that homely feel/look).


Frost the sides of the cake, and then the top until it is evenly covered (as you can see mine was sort of more drizzled).


Now cut yourself a slice and if you have any leftover syrup pour a little on top - because there isn't enough sugar already :P


In the words of Mat...

"It just tastes like sugar,
it's a sugar cake
and there's nothing wrong with that."

Wednesday, October 28, 2009

Banana and Caramel Cake

I have been a bad blogger, I forgot to announce to the world on Saturday that it was Mat's birthday! And not only was it Mat's birthday but on that very same day it was our 6 year anniversary. Yep six wonderful years together and it feels like it has all just flown by. To celebrate this fantastic day I baked Mat a banana and caramel cake. I actually read through a whole heap of cake descriptions to see his reactions - mostly it was no, no, no - but then a yes! Yes he likes banana cake and so it was made.


Banana Caramel Layer Cake (from The Australian Women's Weekly Classic Cakes)
Makes a 24cm bundt cake
(I made a 6" cake and 12 cupcakes instead)

185g butter, softened
175g caster sugar
3 eggs
335g self-raising flour
1/2 tsp bicarbonate of soda
1 1/4 cups mashed banana (I needed 4 bananas)
1/3 cup milk
380g can caramel Top'n'fill (I used half a tin)
3/4 cup thickened cream, whipped
1 large banana sliced thinly (I omitted this)
  1. Preheat oven to 180C. Grease 24cm bundt pan well (or grease and line a 6" round cake tin, and line a 12-hole muffin tray with cupcake liners).
  2. Beat butter and sugar until light and fluffy. Beat in eggs, one at a time.
  3. Stir in the sifted dry ingredients, mashed banana and milk.
  4. Spread mixture into bundt pan (or cake tin and cupcake liners).
  5. Bake for 40 minutes (took my cupcakes 20 minutes and my 6" cake 30 minutes).
  6. Stand cake in pan for 5 minutes before turning onto a wire rack to cool.
  7. Split cake into three layers. Spread bottom layer of cake with half the caramel, top with half the cream then half the banana slices. Repeat next layer. Replace top of cake and dust with icing sugar to serve. (I only split my cake into two layers and I left out the banana slices because I didn't want them to go brown).


Happy birthday and 6 year anniversary Mat - love you!

Wednesday, October 21, 2009

Zoe's 1st Birthday Party


Last Saturday was Zoe's first birthday and it was such a fantastic day. We had friends and family over for a relaxed barbecue and some Beatles Rock Band later in the night. Zoe was brilliant all day long, she even hung out in the shed with the boys to dance and sing to Rock Band - so cute!

And of course you know there was cake...


I made 24 chocolate cupcakes and 24 vanilla cupcakes, each cupcake was topped with orange coloured vanilla butter cream and then topped with a green or blue fondant star.


I even made a little cupcake tower using this great tutorial from Cake Journal - it was pretty easy to do and it looked great. I definitely recommend it if you have a particular colour theme you are trying to follow for a party.


Then of the course there was the cake, a 6" chocolate cake filled with vanilla Swiss meringue butter cream then covered in fondant and topped with a fondant replica of Zoe's favourite toy - Eric the Elephant.


A little close-up of Eric - he was a lot of fun to make!


Cupcake time for Zoe - we lit a candle for her and sang happy birthday. I thought she was going to freak out but she loved all the attention!


Then once the candle was blown out (thanks to me) she had a little taste of the butter cream.


Zoe then continued to destroy the rest of the cupcake - she loved it!


And the all important sliced cake photo - I love those yummy looking layers!


This is Zoe very smily and happy with her grandma.


Zoe opening presents at the end of the night after a quick nap.


After a big day, Zoe gave her new toy puppy a big hug and then went to sleep.

Can't wait for the next birthday party :)

Tuesday, October 20, 2009

New Member of The Cake Slice Bakers


You heard me right, I am one of the new members of The Cake Slice Bakers and I must say I am a little bit excited. Why am I excited you may ask? Well good friends there are a number of reasons:
  1. I get to bake something that is not a cupcake for a change.
  2. I 'needed' to buy a new cook book to bake from for the next year (Southern Cakes by Nancie McDermott).
  3. I am now part of an elite group of bakers.
Yes I am excited.

The first cake that was chosen from the new book was the Cinnamon Pecan Coffee Cake. Now at first I must admit I wasn't very excited about this because I thought that meant that there was actually going to be coffee in the cake. You see I can't stand coffee or anything coffee flavoured - I am a cup of tea kinda gal. After reading the recipe however I was pleasantly surprised to find that there was in fact no coffee in the cake, and instead it is simply a cake that is to be eaten with coffee - yay! So after my absolutely mad weekend (with Zoe's 1st birthday) I baked up this lovely, lovely cake. The cinnamon aroma that comes out of the oven as you bake this cake is just heavenly and the cake itself a lovely balance of light cake with crunchy pecans and chewy raisins. I loved this cake, especially with a drizzle of thickened cream.

Oh and if you are wondering why my cake looks a little dark - let me just say that I won't be trusting Mat to get my cake out of the oven from now on :P


Cinnamon Pecan Coffee Cake
(from Southern Cakes)
Makes a 13"x9" cake

For the Cake:

3 cups plain flour
1 tbsp baking powder
1 tsp salt
1 tsp vanilla extract
1 cup milk
1 cup unsalted butter, softened
1 cup sugar
2 eggs

For the Filling:

1½ cups brown sugar
3 tbsp plain flour
3 tbsp cinnamon
1½ cups raisins
1½ cups coarsely chopped pecans
¾ cup unsalted butter, melted
  1. Heat the oven to 180C. Grease and flour a 13 by 9 inch pan.
  2. To make the filling, combine the light brown sugar, flour and cinnamon in a bowl and stir with a fork to mix everything well. Combine the raisins and pecans in another bowl and toss to mix them. Place the cinnamon mixture, nut mixture and melted butter by the baking pan to use later.
  3. To make the cake batter, combine the flour, baking powder and salt in a bowl. Stir the vanilla into the milk. In a large bowl combine the butter and sugar and beat with a mixer on high speed until pale yellow and evenly mixed, about 2 minutes. Scrape down the bowl to ensure a good mix. Add the eggs and beat for another 2 minutes, scraping down the bowl now and then, until the mixture is smooth and light.
  4. Use a large spoon or spatula to add about a third of the flour mixture to the butter mixture and stir only until the flour disappears. Add a third of the milk and mix in. Repeat twice more until all the flour and milk mixtures have been incorporated. Stir just enough to keep the batter smooth.
  5. Spread half the batter evenly into the prepared pan. Sprinkle half the cinnamon mixture over the batter followed by half the melted butter. Scatter half the raisins and nuts over the top. Spread the remaining batter carefully over the filling, using a spatula to smooth the batter all the way to the edges of the pan. Top with the leftover cinnamon, butter and nut mixture, covering the cake evenly.
  6. Bake for 45 to 50 minutes, until the cake is golden brown, fragrant and beginning to pull away from the edges of the pan. Place the pan on a wire rack and allow to cool in the pan for 5 to 10 minutes before serving in squares right from the pan. The cake is delicious hot, warm or at room temperature.

Wednesday, September 30, 2009

First Decorated Cake

Last week I made plans, cake decorating plans. With Zoe's birthday party coming up very shortly I needed to practice my cake decorating skills to make sure that I can manage the vision I have in my mind. So last week I planned out a special cake to practice all the techniques I will need for Zoe's cake. On Sunday when I baked the Violet Crumble cupcakes I also baked a 6" chocolate cake, wrapped it up and popped into the freezer so that it would be ready to go.

Then on Monday night once little miss Z went to bed I cracked open the fondant and got busy!


May I present to you Clive - The Red Deer. I used modeling fondant to make a model of Clive and at first it freaked me out because the fondant dries so quickly, but by the end of it I was definitely having fun.

On Tuesday I got the cake out of the freezer so it could defrost. I then made up a batch of vanilla Swiss meringue butter cream and filled and coated the cake. Then I popped the cake into the fridge to set. Later that night once little miss Z went to bed I covered the cake in fondant and did a little decoration, to end up with this...


My very first fondant covered cake and fondant sculpture. Now I know that it is by no means perfect, but isn't it just so cute?!


I especially enjoyed putting the polka dots around the side of cake and rolling up those little balls of fondant - that was fun!


And in case you are wondering I needed long pieces of wire to hold up Clive's antlers they go from the tip of the antlers right down through his head - poor Clive!


Since this cake is just a practice run I thought it would best if I got a sliced photo, you know - for you, the readers.


And now that it is sliced I better try some... yummy!

Now that I kind of know what I am doing with this - next time I will take in progress shots for y'all!